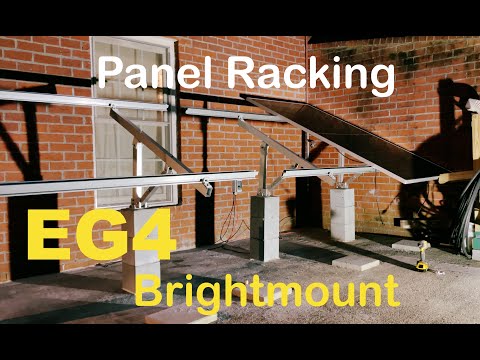
EG4 BrightMount Extension Rail Kit
📦 Products Featured in This Video
EG4 Electronics
EG4 BrightMount Extension Rail Kit
This listing is no longer available at Signature Solar.
Browse Signature Solar →Affiliate link — we may earn a commission if you purchase through this link, at no extra cost to you.
EG4 Electronics
EG4 BrightMount Ground Mount Rack Kit (4 panels)
This listing is no longer available at Signature Solar.
Browse Signature Solar →Affiliate link — we may earn a commission if you purchase through this link, at no extra cost to you.
Troubleshooting note from this video
📝 Description
Discount Coupon code ($50 off $500): GET50TGBATG
Extension Rail kit: https://signaturesolar.com/brightmount-extension-rail-kit/?ref=bkpkbxde (no longer available at Signature Solar)
Ground Mount kit: https://signaturesolar.com/eg4-brightmount-solar-panel-ground-mount-rack-kit-4-panel-ground-mount-adjustable-angle-pre-order/?ref=bkpkbxde (no longer available at Signature Solar)
- Above links are affiliate links to authorized retailer
🛠️ Troubleshooting note on this topic (our experience, not instructions): https://tgbatg.org/articles/eg4-brightmount-ground-mount-rack-extension-kit-experience.html
In this episode, we take a look at the Bright Mount extension rail kit from EG4. This kit is designed to extend the bright out rail system to allow for use of larger solar panels. If you have panels larger than 44 inches wide you need this extension kit to mount for panels to the bright mount rack system. It comes with two splicing rails, two jumpers and self tapping screws for installation.
SKU:1511053-ERK
Upgrade your system effortlessly! Now, you can extend the horizontal rails by an additional 5 inches, allowing for the seamless installation of solar panels up to 45 inches wide. One kit contains a pair of extension sets and one kit is required per BrightMount Rack
#eg4 #solarpanels #energystorage
solareg4
🎬 Related Videos

📝 Video Transcript
splicing rail. Splicing rail. Extension rail. Another extension rail.
Hey, what's guys? Welcome back to the channel. In today's episode, we're going to be talking about these. These right here are pieces of aluminum that you get in the EG4 bright mount extension kit.
Okay, so if you don't know what the EG4 bright mount uh system is, it's pretty much a ground mount system you can use to mount solar panels on the system or on the aluminum rails, right? Uh but this right here is an extension and you may not need this or you may need this, right? Depending on your solar panel sizes. Okay, so for me, I'm using 495 watt helium panels and those panels are like roughly around like 44 and like 3/4 of an inch, something like that, right?
So, if you look at the specs of the system or of the bright mount system, you can kind of tell you can mount four panels that are less than about 42 to 43 in or something like that. We'll see if we can throw a picture of it of the instructions or whatnot. But for my case, I'm I have a 45 in panels. So, you need an extension kit.
And that's pretty much what this is. Okay. So, uh, technically speaking, I right now at this current point in time have four panels mounted on the bright mount rack system. Um, I do not recommend you do it that way, mainly because I have each panel on each side hanging off, maybe only caught by like a half inch, right?
So, they're not really secured. You can secure them, don't get me wrong, without buying this, uh, but not officially and not, let's just say, structurally sound, okay? But it can be done cuz that's how I have it right now. But we did buy this system and let's go ahead and figure out, you know, how you're supposed to use this system.
First thing I will say is that when you buy this system, this is obviously the components that you get. We'll look into it, right? But, uh, from what I could tell, the best place to put this extension kit is between the two sets of rails. Okay?
So, you can technically, um, if you've already mounted your solar panels, you can just add this on to the end of one side, right? But I think the best place to put it to be, you know, the most structurally sound or, you know, probably stiffen it up or whatnot, it's probably going to be in the middle of both uh uh kits so that it kind of, you know, extends it out, right? So, like I said, depending on which way you put it, it may or may not really matter. It probably won't really matter cuz the structurally it's probably going to be the same, but I like the idea of putting in the middle.
So, I'm going to go ahead and do that. mainly because this uh splicing rail being in between you know all of this if you look at it this way between both will actually stiffen up the entire system right so that's my opinion we'll go ahead and look at these components more in detail and then take a look at the instructions so let's get to it so let's take a look at what you get right you get two of these hollow tube rails and these look like they're designed They go inside the racking uh uh rail, right? So, there's two of those equally uh length and there's two of these and you get, you know, all these selftapping screws. So, let's go ahead and see pretty much what the length of these are.
So, if you take a look at these inner rails, they're roughly about 13 and 3/4, right? 13 and 3/4. And you look at this rail, each one appears to be roughly about five and an eighth. All right?
So if you have two of these at five and an eighth, all right, you can technically stack these this way, the longer way, make them a bit longer, right? And you can do this, right? Maybe about 10 and a4. Okay, so uh 10 and a quarter uh splicing pretty much using the splicing rail about 13 and 3/4.
It'll probably give you a good enough uh length to put all the system on there, right? All the panels. But like I said, we're going to have to figure out how that goes. So, this right here is the solar panel mounting uh rail that sits uh where you mount the solar panels and I believe the way that these are supposed or designed to work is that you know if you put this in between here cuz this is the exact same piece that's on there, right?
So, it's just a smaller piece of it. So, if you have this side here, you put this side here, right? And you can put the other side mount uh rail here on the default side. It extends this side out maybe about let's just say what is it like five and a quarter or five and an eighth or whatever it was.
Right? So if you take a look at it extends it out maybe about five and an eighth. Right? So assuming you do this on each side right you kind of mount each side uh this way.
Right? You've extended each side out to do that. So, I don't know if that's the best way to do it or you just maybe put one like this right in the middle uh between both rails. That may be better.
We're going to have to see how that goes. Um like I said, mine I have each one mounted even without the extension kit. So, I have the panel hanging off about this much, right? So, even if I put this on there, even with the current way that it's mounted, it'll be more than enough, right?
Just being in the middle, right? But if for whatever reason you wanted to extend your uh rail out as much as possible because let's just say you had like I don't know 60inch panels or whatnot in width you technically right could only mount this on the left side like this way right here right and then use this extension to mount it out this far right so I obviously wouldn't recommend doing that but you know cuz this has a little bit of play to it as you can tell but you know if you secure them in with these selftapping screws probably won't be a problem. But like I said, it can be done. These right here are the end clips.
And I want to emphasize there's four of each one. Okay? Meaning there's four of these and four of these. So depending on your solar panel, you know, uh thickness, you're going to need to figure out which one you want to use, right?
So there's four of them mainly because you use two on each side at the end of the mount system. So it makes sense to be four. So this one, which is the biggest one here, that ranges here, you can get maybe about 1 and 12 in, right? But if you want to account for where it actually mounts on the rail right here, right?
So this is the cross-section of the rail, you put this in here. And you can get a little bit more in there. Right? Um I don't recommend extending it all this much, right?
Cuz that's, you know, you're not giving too much biting room right there. But you technically could make this happen in case, you know, this your solar panels are like super thick, right? So let's go see what that really looks like. If you take this and you go from the top of the clip to the bottom here, you can get maybe about, you know, 1 and 3/4, right?
Uh 3/4 is the max one and 3/4 is probably about the maximum thickness you're going to be able to get on a solar pan on this system, right? And this one here, same difference, right? Cuz this one mounts in this way, right? And you could use it this way.
So you can get a little bit more here. If you take a look at the cross-section here, let's see, right? How much do you get there? So, this you can get from top here to the bottom here, which is maybe about 1 and a half.
All right. Um, if you play it pretty well. So, you know, I was looking at this thinking, huh, that's interesting that they have a hole right here. Why do they do that?
That's mainly because this is what I would call combination clamp. As you can see right here, there's a thickness here, right? And that one may be too small. So, but there's a little bit medium here.
So, if you want to look at this way, here's a small, here's a medium, and then, you know, here's the large. So, in order to use it the other way, the medium way, right, you want to take this off the hole here, go down this way, put it this way, and you can put it in here. Right? So, then this is how you use the medium thickness end clamp.
Let's see if I can get this thing screwed on there. Check this out. Right? So, let's just say we have it screwed in maybe about here.
Right? So you can get on this clamp top to here maybe also about one and a half right one and 38 probably ideal right so if you want to look at the thickness of this clamp here that's about roughly maybe what is that like 15/16 right right there of this one here the smaller one here is definitely a lot smaller so if you look at it this way you can see you're getting maybe about 3/4 right if you look at this one here. It's about 1 and 1/2, right? So, like I said, uh there's the three different size clamps.
So, the interesting thing I want to point out here is this combination clamp because I didn't notice it at first, but then I was trying to find one that actually works for my panels. None of these fit, right? So, I was like, "Huh, I thought that was supposed to be three sizes." So, I figured out this one is actually the combination clamp that comes with it.
Right? So, depending on what size you need, just take the uh bolts off and put it on the other hole. So this right here is a splice jumper or the bonding jumper, right? So, what it does is it slides between these two rails.
So, this rail piece here and the rail piece back here and it like electrically connects and also physically connects the two splices together, right? So, it splices the two rails together. It kind of slides in one way, right? uh with this uh channel grip and then you put these together.
These little metal clips here are what's supposed to bite into the coating, right? So, it's got spikes on them. So, they bite into the coating that's on the aluminum so that it actually gets a good electrical connection. Right?
So, on both sides, that's how these two rails are bonded together electrically. This is the extension kit. So, the extension kit comes with two. So, here's one here, and then the other one is down there.
And as you can see, I did not use the selftapping screws that came with the kit. Mainly because I could not find the nut driver that fit them. Mainly because the heads on those nuts or those uh nut uh selftappers were some like metric size that I just could not find easily. I'm sure I have like a few laying around somewhere.
I just couldn't find it. So, I just used the selftapping screws that I had. And I made sure to leave a pretty decent size gap here and here. And you need to do that when you uh install this kit.
Mainly because it's aluminum, it's pretty long. It will expand and contract. There is a metal um splicing rod that goes in this rail all the way across, right? That keeps it really secure or snug.
And then this uh selftapping screw actually keeps the bar really well connected. Okay. Technically, I would have used more, but I wanted to see how it was going to work before I just started drilling a bunch of holes in this aluminum rail. So, you know, that's how that goes.