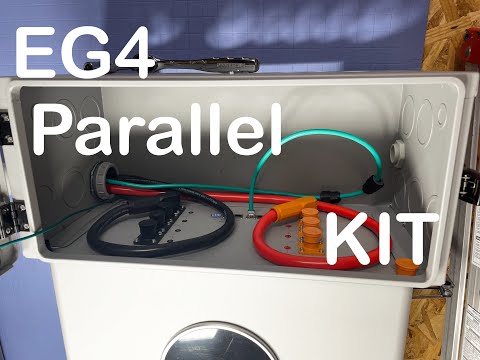
How to setup EG4 6000XP Indoor Wallmount battery and conduit box kit off grid system
📦 Products Featured in This Video
QuickCable
QuickCable MagnaLug 2/0 AWG Battery Lug
Buy on Signature Solar →Affiliate link — we may earn a commission if you purchase through this link, at no extra cost to you.
EG4 Electronics
EG4 WallMount Battery and 6000XP Inverter Bundle
This listing is no longer available at Signature Solar.
Browse Signature Solar →Affiliate link — we may earn a commission if you purchase through this link, at no extra cost to you.
EG4 Electronics
EG4 6000XP Off-Grid Inverter
Buy on Signature Solar →Affiliate link — we may earn a commission if you purchase through this link, at no extra cost to you.
QuickCable
QuickCable MagnaLug 2/0 AWG Battery Lug
Buy on Signature Solar →Affiliate link — we may earn a commission if you purchase through this link, at no extra cost to you.
EG4 Electronics
EG4 Indoor WallMount Battery Conduit Box
This listing is no longer available at Signature Solar.
Original listing removed; this conduit box covers the 280/314Ah batteries.
See the current model: EG4 Indoor Buildable Conduit Box →Affiliate link — we may earn a commission if you purchase through this link, at no extra cost to you.
EG4 Electronics
EG4 PowerPro Battery Paralleling Cables
This listing is no longer available at Signature Solar.
The store redirects to the 280/314Ah kit; a separate 100Ah kit exists.
See the current model: EG4 All Weather Battery Paralleling Cable →Affiliate link — we may earn a commission if you purchase through this link, at no extra cost to you.
Parts list for this build
🔗 Links Mentioned
Affiliate link — we may earn a commission if you purchase through this link, at no extra cost to you.
📝 Description
Affiliate link — we may earn a commission if you purchase through this link, at no extra cost to you.
Discount Coupon code ($50 off $500): GET50TGBATG
2/0 cable lugs: https://signaturesolar.com/magnalug-2-0-awg-battery-lug-quickcable-6420f?ref=bkpkbxde
EG4 6000XP Battery Kit: https://signaturesolar.com/eg4-wallmount-indoor-battery-280ah-51-2v-14-3kwh-eg4-6000xp-off-grid-inverter-bundle-8000w-pv-input-6000w-output-all-in-one-solar-inverter-bndl-e0009/?ref=bkpkbxde (no longer available at Signature Solar)
EG4 6000XP only: https://signaturesolar.com/eg4-6000xp-off-grid-inverter-split-phase/?ref=bkpkbxde
EG4 Indoor Wallmount Battery: https://signaturesolar.com/eg4-wallmount-indoor-battery-48v-280ah-14-3kwh-indoor-heated-ul1973-ul9540a-10-year-warranty-pre-order/?ref=bkpkbxde
EG4 Indoor Wallmount Battery Conduit box: https://signaturesolar.com/eg4-48v-indoor-280ah-wallmount-battery-conduit-box/?ref=bkpkbxde (no longer available at Signature Solar — current model: EG4 Indoor Buildable Conduit Box. Original listing removed; this conduit box covers the 280/314Ah batteries.)
EG4 Indoor Battery Parallel Kit: https://signaturesolar.com/eg4-powerpro-battery-paralleling-cables/?ref=bkpkbxde (no longer available at Signature Solar — current model: EG4 All Weather Battery Paralleling Cable. The store redirects to the 280/314Ah kit; a separate 100Ah kit exists.)
Above links are affiliate links to authorized retailer Signature Solar
1632010 - lugs
1511094 - conduit box
BNDL-E0009-1 - inverter, battery, conduit box kit
1511092 - Indoor Battery
#eg4 #offgrid #solar #energystorage #inverter #lithiumbattery
batterysolarinverteroff gridoff-grideg448v
🎬 Related Videos
📝 Video Transcript
Hey, what's guys? Welcome back to the channel. Today episode I want to talk to you about wiring up this 6000XP indoor wall mount battery kit. Okay, so you can buy this separately, you can buy this separately, and you can buy the battery separately, but they do have a kit that's for sale that includes all of it such that you have all that stuff you need to get ready to go.
Okay, so in this episode, we're going to ignore everything that's behind me, which means, you know, pretty much everything on this side, and we're only going to be talking about this. So, if you bought the kit or you bought the items separately and you're trying to figure out how to wire it up, this video will pretty much tell you how to do that. Okay, but before you get started, let's talk about the things that it includes. Let's talk about the things that you need.
So, obviously included, included, included. These battery cables are included, but you will need to provide your own two lugs and the heat shrink that goes with that obviously. And you're going to need to provide a way to crimp those two lugs. Okay, so if you're only doing this one thing and you don't have that, you probably could go find some decent hammer crimper and those generally work pretty well, generally pretty cheap, unless you have a friend or something like that, right?
Uh but you will also need to provide your cables for whatever your load is going to be. You're going to need to provide cables for whatever your grid connection is going to be. And if you're using the generator connection, you're obviously going to need to provide those cables. And um if you have a solar connection connected to it, you're obviously going to have to provide those cables.
Okay? So if you are providing those cables and they are stranded, you want to use fererals. So make sure you get the fereral kits for your cables. But the easy way to look at it is everything that uh is needed to get this thing up and going, not connected to the grid is included except for the terminators or the two out lugs here, which you would think they probably should include as a part of the kit, but they do not.
Okay, so let's go ahead and get that one going. All right. So, before we get going, the other things you're going to need is you're going to need a flathead screwdriver and possibly a uh PH2 Phillips head screwdriver, but you could get this done without that, but I would say definitely get that cuz it'll make it a little bit easier. You will need a 10 mm socket and a 13 mm socket.
The 10 mm one for this being ground wire uh connector down here. 13 millimeters for this uh socket here. And you will need to provide roughly one and a half to two feet of ground wire to connect the uh non-conducting surfaces uh or these uh system metal surfaces to the ground here. Okay.
And you probably want to provide a ring terminal connector on that to get that going. But like I said, if you need a list, we'll try to throw up in the description or something like that. But without too much further ado, let's get to it. All right.
So, the first thing we just did was we just grounded the system. Okay. So, uh this conduit box is metal. This battery is metal.
So, it all kind of needs to be grounded. And remember, ground is really just a reference point. So, uh we grounded this all these metallic surfaces here using this ground wire to this P her uh protected earth uh connection bar here. Okay.
Okay. And remember this this uh ground cable right here that we just installed this copper bear wire is is not uh included. So you do have to purchase that one separately. And yes, I should have used a different connector or a different wire, but I just did not have any extra ground wires that I had handy.
So I just used a uh bare copper wire to do that. Okay, so moving on. Let's go ahead and connect the battery cables. mainly because the battery cables are larger, so they may uh probably be a little bit more difficult to move around.
So, you definitely want to connect them first. All right, so these are the battery cables that are included. Uh you get these two cables, pre-terminated DEXON quick connects, and these ends usually come pre-stripped, but with not uh without these lugs. So, when you do buy this kit, make sure you buy the lugs and make sure you get them connected.
Um, I got the 3/8 in lugs and that's what we're going to use to connect up here. So, we want to loosen uh these nuts here. And to do that, we're going to use this 13 mm socket. So, we just put the battery cables in.
It doesn't look, you know, the best. You could obviously cut them to length if you are going to do that, but I really didn't know what I was going to do with let's just say like 6 to 8 in of that two out cable. So, I just left it as whole, but you know, up to you is up to you. So, uh there is a torque spec for tightening these down.
Right now, we just snug them up. We'll come back around once everything is ready and just torque them down to spec. Okay. So, the next thing we're going to do is we are going to connect the solar panel wires here.
Okay. And I'm going to use just uh nonsolar wire to just demonstrate how that should be connected. But uh don't use this wire. Like I said, this is just a demonstration.
In order to connect the solar PV, there's PV1 and two here. You are going to need something like a flathead number one. So go ahead and loosen these connectors up right here. For my solar, even though, like I said, this is not solar wire.
We're just going to pass these through here. So like I said, the solar connection is here. Remember, whatever wires you are using, make sure you connect fererals on them so you don't have just like loose strands of wire everywhere and you can just get a good connection. Uh, like I said, you definitely need a a flathead.
We are going to connect the load center here. Okay, so this load is a 240 volt load and there's a [snorts] hot hot that connects here, a neutral that connects there, and an earth that connects here. Okay. So, uh we're going to be using in this demonstration, let's just assume that these wires are going to go to your loads panel, critic loads panel, whatever you want to put.
Like I said, uh hot here, hot number one, black here, hot number two, red here, and the white, uh neutral here, and the ground here. Some people are going to try to figure out, you know, is does it matter which wire you use, red or black for which hot? In this case, it doesn't matter cuz there's only one of them. But if you were putting mo more than one of these in parallel, then uh it does matter because you want, you know, hot one here, right?
Uh and then black here or you could put black here and hot here. That doesn't matter as long as you follow the same schematic for all the other ones that are in parallel. Okay, hopefully that makes sense. Uh this is stranded wire, so there is fererals on some of these.
So we'll go ahead and get this connected here. So, we just snugged them up and we'll come back around. Like I said, try to torque everything down better to spec with a torque wrench. But for now, hots are connected here.
This uh demonstration is not going to include connecting to the grid. But if you were going to connect to the grid, it would be pretty much exactly the same thing we just did. hot one here, hot two here, neutrals here, uh ground here. And if you were going to bring in a generator, it would be exactly the same thing.
So, you'd be following what we just did to all the other uh breakers here and here. And this may be obvious, but just in case, you may have to make sure uh when you're doing any of this, make sure everything is off, right? The inverters off, the batteries off, uh the connections you're connecting to is off, wherever to and from, everything needs to be off. and make sure it's been off for a little bit so it can discharge capacitors.
And if you don't know what that really means, just give it more time. Uh, moving on from here, as we talked about, right now, this inverter is going to be pretty much good to go from an energywise, right? But what we need to do is set up battery communications between this battery and this inverter. So, in order to do that, you want to go ahead and grab your battery cable that came in this kit.
And that's going to be this orange cable here, right? You see right here, this is a red or an orange cable here that says Batcom 568B, right? So, we're going to go ahead and take this first part here, feed it through the hole down here, and put it onto this far RJ45 port right here that says uh Batcoms. So, we're going to plug this in right here.
Then, we are going to make sure all the DIP switches are up except for number one. The first dip switch will need to be down. We're going to go ahead and put this here and then plug it into this CAN port down here. Okay.
So, can port down here com there. So, now that we have everything connected, let's go ahead and turn it on and see what happens. All right. So, my way of turning it on is we're going to go ahead and hit this battery uh breaker such that the connection is made from these battery terminals to this.
And I'm going ahead and remind you, don't touch anything after you turn it on or even as you're turning it on. Okay. So, uh, that's going to be going there. We're going to hit this power switch on.
And then we are going to flip this battery breaker to the on position, right? That way, the current there is connected. And then as we power up the battery, the pre-charge resistors in theory should pre-charge everything as it comes on. Okay.
So, uh, like I said, all of these white breakers here are going to be off. And we are going to hit this button here. So, if you wanted to get the UPS going here, what you really have to do is hit the switch on this side of the inverter. So, if you're facing the inverter's on the left side, but if you are, the inverters on the right side.
So, flip the switch. This part will come on that says UPS enabled. And by default, this thing will be set up for 240 uh volts out, 120 on each leg at 60 hertz. Okay, so right now it says right here, UPS enabled.
It's 120 volts. There should be no load on this because like I said, I don't even have the breaker enabled. But this is what it looks like when it is going. Okay, everything's happy.
This happy face here with normal means everything is good. But other than that, that's all you really get. So, that's how you would really connect this entire system like this. And mind you, when you get it connected, don't touch anything.
Okay, make sure you put the covers on and torque everything down to the right specs. Okay, in the next video, we'll go ahead and get the cable for parallel communications and all that stuff going here in case you wanted to have more than one battery. But, like I said, almost all the stuff is included. you do need to provide your additional lugs, which I really wish in a kit type configuration they would do that, but I guess they're probably assuming most people who are putting together these types of system probably already have those tools and those connectors.
Okay, so all this stuff is going to be available from pretty much almost any authorized retailer. I bought this all the stuff from Signature Solar. So, if you want to know, you know, what to get, just check the links in the description or whatnot and you'll go ahead and get that going. But I would say for the money, this is probably the most versatile capable system you can get.
Mainly because 240 in one unit. You have the matching conduit box and you have the battery which is all integrated together. Okay. So, you know, it's going to be really hard to beat that, especially for a single unit all-in-one 240 system to get that going and get it off the ground.
So, probably the most basic, like I said, versatile system you could get for off-grid applications. So, if you're looking to buy something like this, I would definitely look at a system like this. Okay, so hope this video helped you guys out. If you have any questions, let us know.
Otherwise, get back to work. Thanks for watching and we'll see you guys next time.