
EG4 48V Indoor 280Ah WallMount Battery Conduit Box Unboxing / Review | 1511094
📦 Products Featured in This Video
EG4 Electronics
EG4 Indoor WallMount Battery Conduit Box
This listing is no longer available at Signature Solar.
Original listing removed; this conduit box covers the 280/314Ah batteries.
See the current model: EG4 Indoor Buildable Conduit Box →Affiliate link — we may earn a commission if you purchase through this link, at no extra cost to you.
EG4 Electronics
EG4 6000XP Off-Grid Inverter
Buy on Signature Solar →Affiliate link — we may earn a commission if you purchase through this link, at no extra cost to you.
EG4 Electronics
EG4 WallMount Indoor Battery 280Ah 51.2V
Buy on Signature Solar →Affiliate link — we may earn a commission if you purchase through this link, at no extra cost to you.
EG4 Electronics
EG4 WallMount Battery and 6000XP Inverter Bundle
This listing is no longer available at Signature Solar.
Browse Signature Solar →Affiliate link — we may earn a commission if you purchase through this link, at no extra cost to you.
Comparison that includes this video
🔗 Links Mentioned
Affiliate link — we may earn a commission if you purchase through this link, at no extra cost to you.
📝 Description
Affiliate link — we may earn a commission if you purchase through this link, at no extra cost to you.
Discount Coupon code ($50 off $500): GET50TGBATG
Conduit Box: https://signaturesolar.com/eg4-48v-indoor-280ah-wallmount-battery-conduit-box/?ref=bkpkbxde (no longer available at Signature Solar — current model: EG4 Indoor Buildable Conduit Box. Original listing removed; this conduit box covers the 280/314Ah batteries.)
6000xp Inverter: https://signaturesolar.com/eg4-6000xp-off-grid-inverter-split-phase/?ref=bkpkbxde
Indoor battery: https://signaturesolar.com/eg4-wallmount-indoor-battery-280ah-51-2v-14-3kwh-indoor-heated-ul1973-ul9540a/?ref=bkpkbxde
Kit for battery, box, and inverter: https://signaturesolar.com/eg4-wallmount-indoor-battery-280ah-51-2v-14-3kwh-eg4-6000xp-off-grid-inverter-bundle-8000w-pv-input-6000w-output-all-in-one-solar-inverter-bndl-e0009/?ref=bkpkbxde (no longer available at Signature Solar)
1511094
#eg4 #lifepo4 #energystorage #offgrid
lifepo4batterysolarinverteroff-gridoff grideg448v
🎬 Related Videos
📝 Video Transcript
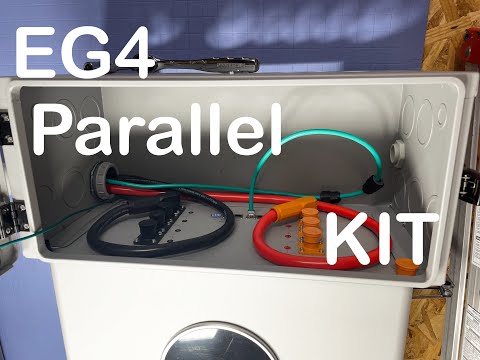
So, this is the conduit box that uh you can purchase either separately or as a kit. Let's see what comes in the box. I know a lot of people always have questions on what comes in there, right? So, first you get all these like gland covers.
You know, it's rubberized gland covers. Uh you also have the glands that come and fit there, right? You also have the smaller size glands. And then, you also got these little uh I want to call them like anti-chafing covers or protectors so that you know, cables don't get chafed up.
Uh you also have mounting screws and keys. And then, you get the actual conduit box, which is actually important, okay? Uh so, a lot of people kind of wonder online, you know, when they haven't actually seen this, is this plastic or metal? This thing is actually metal.
It's just painted like this, so it kind of looks like it's plastic. So, if you want to know how to use it, you want to make sure that this box, this big open square, is sitting on top of the battery cuz that's how it work, and this black latch is on your right side, right? So, the way it opens, you open it, you can unlatch it, and you got this opening here. So, in this opening, obviously, this part will sit on top of the battery.
The four screws in here, you would bolt down to the battery, all right? And you obviously want to ground all of this stuff, so make sure you're grounding all of that stuff properly. There is a little gasket here that helps kind of keep it more airproof or waterproof, but you know, you're not going to be putting this outside, all right? Unless you're going to be using this on the 18K with the Power Pro battery.
But, you know, this one, in my case, we're going to be using the 6000 XP, okay? And if you want to look at which boxes or holes are pretty much knocked out, right? Um the ones on the back here, all of the entire back row is knocked out, and that's set up perfectly to match with the 6000 XP. There's other ones on here, right?
And the knockouts are still there, and they haven't been knocked out. So, you know, if you have a 6000 XP, this is the one you want to get. And if you look around to the backside, uh there is a little lip that they cut out or dadoed out, um such that the the lip mounting lip bottom part of the lip for the 6000 XP fits in there, and you can access the screws to mount the bottom of the 6000 XP to your wall surface, okay? Uh on the sides, none of the uh knockouts have been knocked out out of the box.
If you are going to be paralleling, you know, multiple batteries together, you will have to knock some of those out, but uh it will not come knocked out by default. That right there is the conduit box for the EG4 indoor wall mount battery. And before we close this up, I want to point out a few key points. And one of them is the top part of the conduit box and pretty much all the sides.
So, all the parts where has like a pre-stamped, so you can kind of knock those out or knockouts, I think they they really call them, is that uh they are not waterproof or watertight or airtight by any means. Because they are pre-stamped, there's almost like two or four spot welds holding them into place. So, there is an air gap there. You can see the light coming in through those cracks.
So, if you're planning to use this or get it because you think it's like going to be watertight, it's not going to be the case. But, also remember, this is not a watertight or outdoor-rated battery, okay? So, the second thing I wanted to point out is that the conduit box sits flush with the backside of the battery, but not the battery mounting plate. So, the battery mounting plate sits close about uh maybe an inch to uh half an inch to about an inch off the wall, all right?
Off the backside of the plate. So, uh there is a gap between the back of the conduit box and the wall when you mount it. So, make sure you are aware of that if, you know, if you needed it to be flat or whatnot because it will not sit flat with it, mainly because the mounting plate uh sits off the backside of the battery. So, uh that's something to know and think about in case you wanted to know.
But, the other thing to know on that is that the 6000 XP will mount to the wall, right? Just like the battery can mount to the wall. So, there is a bit of a gap uh inside of the conduit box if you look here where that mounting flange is, but it's not a problem, mainly because the uh it's been cut out so you can access the holes there, right? The other thing, well, since we're talking about the holes is that there are holes on the uh conduit box that allow you to access the three screws that hold the cover plate for the 6000 XP on on the bottom, okay?
I I'm assuming a lot of people probably won't even put the three screws at the bottom on cuz the two on each side will probably be good enough. But, it's going to be good to know that there are holes on the conduit box so you can access and put the bottom screws on and off, okay? So, like I said, this whole system is rated to be indoor, so hopefully, you know, not a lot of stuff bothers you. But, in case you you had a, you know, an issue with the gap on the back, you could just put like two additional hardy boards up or you know, whatever fits your needs.
So, like I said, hopefully this video helped the guys out and that's what you get with this conduit box. Let us know if you have any questions. Otherwise, have a great day and we'll see you guys next time.