EG4 6000XP + Eco-worthy LiFePO4 Battery Communication Setup (WORKING)
Troubleshooting note from this video
🔗 Links Mentioned
Affiliate link — we may earn a commission if you purchase through this link, at no extra cost to you.
📝 Description
Affiliate link — we may earn a commission if you purchase through this link, at no extra cost to you.
Learn how to properly set up battery communication between your EG4 inverter and a 314Ah LiFePO4 battery using CAN bus. This step-by-step guide covers everything you need to get reliable communication working on the EG4 6000XP, 12000XP, and similar inverters.
EG4 6000XP: https://signaturesolar.com/eg4-6000xp-off-grid-inverter-split-phase?ref=bkpkbxde
Eco-Worthy Battery: https://amzn.to/3OhYlIs
In this video, I walk you through the exact wiring, DIP switch configuration, CAN protocol settings, and inverter menu setup required to sync your battery management system (BMS) with your inverter.
If you’ve been struggling with battery communication issues, incorrect SOC readings, or inverter compatibility—this guide will help you fix it fast.
What You’ll Learn:
How to connect CAN bus between inverter and battery
Correct Ethernet cable (spoiler: standard Cat5e works)
DIP switch address setup (critical step!)
Setting LuxPower protocol on LiFePO4 battery
Configuring inverter battery type and brand
How to verify communication is working
Common mistakes and troubleshooting tips
Compatible Systems:
EG4 6000XP inverter
EG4 12000XP inverter
314Ah LiFePO4 batteries (Eco-worthy & similar)
Pro Tip:
If communication fails, double-check:
DIP switch address = 1
CAN protocol = LuxPower
Inverter battery type = Lithium + matching protocol
Monitoring:
Using the EG4 monitoring app, you’ll be able to see:
State of Charge (SOC)
Charge/discharge limits
Power flow direction
Battery capacity data from BMS
#EG4 #SolarBattery #LiFePO4 #OffGridSolar #SolarInverter #BatterySetup #CANbus #SolarDIY #EnergyStorage #6000XP
0:00 Intro – What This Video Covers
0:14 System Overview (EG4 + 314Ah Battery)
0:44 Confirming Communication is Working
1:07 CAN Cable Connection Explained
1:29 Ethernet Cable Requirements (Important!)
2:08 Connecting CAN to BATCOM Port
2:17 DIP Switch Setup (CRITICAL STEP)
3:02 Multiple Batteries Addressing
3:21 Battery CAN Protocol Settings
3:48 Accessing Battery Menu & Password
4:21 Switching from RS485 to CAN
4:28 Setting LuxPower Protocol
4:39 Power Cycling the Battery
4:48 Inverter Settings Menu
5:00 Setting Battery Type to Lithium
5:20 Selecting Correct Battery Protocol
5:50 Inverter Reset Process
6:09 Confirming Communication Data
6:46 Capacity & SOC Explanation
7:04 Alternative Setup (No Communication Mode)
7:12 EG4 App Monitoring Overview
7:36 Live Power Flow + BMS Data
8:06 Charge/Discharge Limits Explained
8:31 Final Results & Wrap Up
Inverter: EG4 6000XP
Type: Hybrid Solar Inverter
Output Power: 6000W
Battery Voltage: 48V system
Communication: CAN / RS485
Compatible Protocols: LuxPower, others
Monitoring: EG4 App support
Application: Off-grid / Hybrid solar
Battery: 314Ah LiFePO4 (Eco-worthy type)
Chemistry: Lithium Iron Phosphate (LiFePO4)
Capacity: ~314Ah (BMS reports ~320Ah+)
Nominal Voltage: 48V
Max Discharge: ~200A
BMS Communication: CAN / RS485
Cycle Life: 4000+ cycles
Expandable: Yes (parallel support with DIP addressing)
batteryinvertercommunicationprotocolbmsdipsetuptypeecoluxpowermonitoringpowerstepswitchworking
🎬 Related Videos
📝 Video Transcript
Hey what's up guys, welcome back to the channel. On this episode, we're going to go over how to set up battery communications between an EG4 inverter and a Eco-Worthy 214 amp hour lithium iron phosphate battery. As you saw earlier, the battery communication is working just fine here. Uh this In this setup, we're going to use exactly the or specifically the 6000 XP, but the instructions are going to be the same if not exactly the same or similar if you use the 12000 XP or other similar uh EG4 inverters.
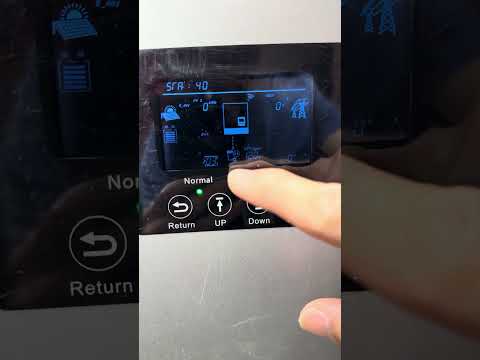
So, I know the interface is a little bit different, but the protocol and all that stuff is what actually really matters here. All right, so as you can see here, assuming we can get the screen to show up on camera, you see 99% on the battery. It's 99% full everything right here. It's happy as you can see in the happy face.
It's drawing . 02 323 uh amp hours as well. So, uh if we can get the screen to show here. If that's a little better at that angle.
Anybody with the 6000 XP knows the deal with this screen, right? So, here's the screen. You can see the communication is obviously working. Uh what Let's go over the uh connections here first.
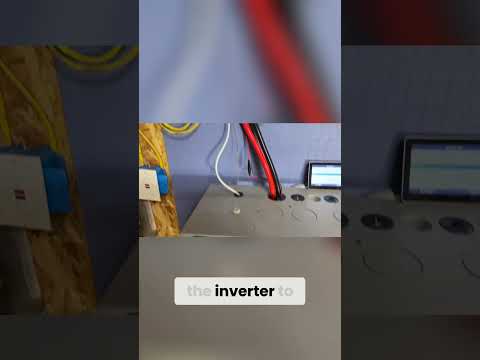
So, as we go here, you can see here we've set up using a CAN uh communications port here. We are not using the RS485. And this ethernet cable goes all the way up and plugs in right here, right on the part where it says com that com. You can see right there, that com.
Um it's a standard ethernet cable. Um I verified that mainly because I'm using a standard ethernet CAT5e cable right here. No special pin outs or nothing special is needed. The ethernet cable that came with this inverter, I believe, uh or maybe it came with the battery, is this orange one and I checked the pins.
It's exactly the same if you check it. Um it's a standard pin out. So, any ethernet cable is going to work here. CAT5, CAT5e, CAT6, whatever you got, uh that's going to work as long as it's a standard pin out.
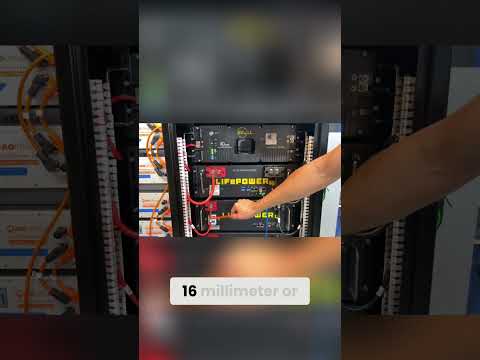
So, the what you do is you connect from this port CAN to that port there. Done. Um the other thing you need to do, and this took me a while to figure out, is this uh part right here, which is the address. If you look at mine, I set number one to be up and then two, three, four to be down.
That gives it the address of one. Uh for some reason, I don't know how. Uh when I got it out of the box, I just assumed it was on one and I was messing around with it for a while, couldn't figure out what was going on. And for some reason, mine DIP switches were not like this out of the box, or maybe I missed it, or maybe one of the kids did, who knows.
But, I just always assumed that was one and then just working with it, was troubleshooting it for a bit, and then came back around, you know, let's check everything from the beginning. And right now, it wasn't It is like that now, but it wasn't. So, make sure you do number one up and then two, three, four down, which gives it the address one. Um obviously, if you have multiple of these batteries in parallel, you're going to have to set the second one to be number two, number three, number four.
All that is in the uh manual, so just read that, but it's pretty uh DIP switch. Uh it The logic is pretty much any standard DIP switching, right? So, uh just make sure you set the one you're going to use for communications to the inverter to host address one. All right?
There you go. That's connected here, and that's what the connection is with the inverter. So, let's go check the actual battery settings. As we saw earlier, we said uh we're using CAN, right?
So, uh right now, our CAN protocol is set to Luxpower. If you go all the way back out, let's go to home, um it's going to look something like this. Right now, we're at 99%. We're drawing 1.
66 of idle consumption, cuz obviously nothing is pulling uh power from this thing or plugged into the inverter right now. So, how do you get to that menu? You press this button. Um I've already entered the passcode here, so I don't need to enter it, but if for some reason um um uh if you get a pass code thing here, you need to enter a password to get into uh the menu and actually change things.
So, uh that pass code for me was written inside of the manual, so when you get this battery, do not throw it out because for me, mine was written inside of the manual. I don't know if they're all the same. Maybe they are, maybe they're not, maybe they're specific per battery, who knows. But, um just make sure you keep that in mind.
So, uh right now, it's on RS485. We're not using RS485, we're using CAN. So, go to CAN, orange means it's selected, and then right now, mine is set to Lux Power. So, uh once that's been changed, you'll probably need to power cycle the battery.
So, I would just turn the battery off uh with the actual BMS power, not just the breaker, and then give it maybe 5 seconds, and then turn it back on, and you should be good to go. And then, going back to this screen, I'm not sure how easy it's going to be to see this screen right here. We're on uh the main screen here. Hold this button down for about 3 seconds or so, and it'll go there, and you want to move up to uh bus or uh setting number three.
Come on, man. Setting number three, if you see setting number three, it's that setting right there. Uh you hit enter to go into that setting. And then, um right now, it's set to type lithium ion, as you can see right there.
That's what you want. Um set enter. And then, it's going to ask you for the brand. Uh there is a good uh picture of a manual.
I'll see if I can throw up it on the PDF or something like that that tells you which one to use uh or what each number corresponds to. For me, I'm using number six. Number six corresponds to Lux Power. So, if you use Lux Power here, and since we set the CAN bus down there on this battery to Lux Power, the communications protocol should match up.
As you see right there, six. So, I'm going to get back out of here. And then once you hit enter, it'll your inverter will reset. And then once it resets, it'll boot back up.
If your inverter doesn't reset for whatever reason, maybe there's newer firmware you're running different firmware than I am, then you can just power cycle your inverter and then it'll come back up. But I'm pretty sure that they all reset after you change that setting. So, after that, you will have communications working cuz it says right there battery 323 amp hours. See if we can get this thing to focus here.
And then 99% And right now it's drawing that much kilowatt hours, right? So, 223 amp hours is what the BMS thinks that it has. Even though this BMS or the advertising here says 314 amp hours, but this capacity here says 320 amp hours. So, you know, there's some you know, communications funny stuff going on there.
But the important thing is that the capacity and the state of charge seems to match up and it does allow you to work use the inverter without having to go to lead acid. If you don't want care about communications like this, you can use this battery and this inverter just set everything to lead acid, put in all the parameters and the values and you'll be pretty good. But for people who want to have communications set up, that's how you do it. So, going back into the app, this is what it looks like.
I did put a small fan load on the inverter so we could make sure that the power is going through the entire system even though the inverter is on and nothing's being drawn from it for some reason. Maybe sometimes it doesn't look like power's being drawn from the battery. So, right now we're inside the EG4 monitor app and as you can see here, the battery is at 99% state of charge. You got 73 watt hours being discharged from this battery.
As you can see right here, the parallel number of batteries or number of batteries you have is one. This one right now says uh, capacity is 323. The BMS charge limit is 92 and the BMS discharge limit is 195 amps. So, the battery communication is working.
You can even see the arrows showing the way power is flowing from um, the battery to the inverter to the uh, AC out. So, that's what's going on here. Uh, this the charge limit and discharge limit I think may or may not change depending on the state of the battery. So, right now the battery is at uh, 99%.
So, it may not be able to charge as quickly to 100% maybe. Um, you could probably test this by drawing the battery down some more and see if the numbers change as uh, the battery is at a lower percentage, right? Uh, but the BMS discharge limit right now says 195 which I feel like it should say 200 because the uh, battery was rated for 200 but you know, I'm not going to fret over 5 amps. But, as you can see here the battery communication just works.
So, hopefully this video helped you guys out. If you have any questions, let us know. Otherwise, have a great day, get back to work and we'll see you guys next time.