How to Install Ring Terminals on 6 Gauge Wire romex | Victron Quattro Wiring Made Easy 120v 240v
🔗 Links Mentioned
Affiliate link — we may earn a commission if you purchase through this link, at no extra cost to you.
📝 Description
Affiliate link — we may earn a commission if you purchase through this link, at no extra cost to you.
3M Splicing Tape: https://amzn.to/40dy5RY
6 AWG ring terminal: https://www.lowes.com/pd/Utilitech-6-Ga-Ring-Silver-2-Count/5014429279
Hydraulic Crimping tool: https://amzn.to/4egO8og
In this video, I’ll show you exactly how to install heavy-duty ring terminals on 6-gauge ROMEX stranded copper wire — perfect for Victron Quattro inverter/chargers or similar off-grid and solar setups.
We’ll cover:
Choosing the right ring terminals for 6 AWG wire
Why stranded wire requires crimped terminals
How to use a hydraulic crimper for a secure connection
The difference between light-duty and heavy-duty terminals
How to seal connections with 3M self-bonding splicing tape
Tips for connecting to Victron Quattro’s terminal lugs
Whether you're wiring up solar power systems, off-grid setups, or just learning electrical basics, this guide will help you avoid common mistakes and build safe, reliable connections.
🛠️ Tools/Materials Used:
6 Gauge ROMEX
Heavy-duty ring terminals (1/4" lugs)
Hydraulic crimper
3M splicing tape
📦 Victron Quattro Model:
48V 10kVA – No spring clamps, requires stud connections
🔧 PRO TIP: Always torque your lugs to spec and use proper strain relief!
#RingTerminals #6GaugeROMEX #VictronQuattro #ElectricalDIY #SolarPowerWiring #OffGridSetup #CrimpingTools #StrandedWireTips #VictronEnergy #diyelectrical
ringterminalsdutyhowhttpsquattrovictronwireconnectionsgaugeheavyhydrauliclugsoffromex
🎬 Related Videos


📝 Video Transcript
Hey what's up guys, welcome back to the channel. In this episode I'm talk to you about setting up these Romex connectors. So these right here are these heavy duty ring terminals for six gauge Romex and this right here is six gauge Romex. It's got two conductors and a ground.
It's really a three conductor and a ground one but that just took one out cuz we only need two and a ground. So the ground is obviously here and these wires are stranded. So in order to get them on the Victron with the what do you call it? The studs you need to get ring terminals on them.
So that's what we're going to be doing here. So if you're interested in that, stick with us. So as mentioned here, this right here is heavy duty ring terminals and this is made for six gauge wire. It's a quarter inch plug.
So the thing are the quarter inch ones. So the one you really need to take into account here is that they make I saw when we were at the store we saw some light duty or medium duty although they weren't really labeled that way. But I definitely went with the heavier duty ones because I've used the light duty ones before. Actually we used them on on previous videos and they just didn't seem like they were going to really do the job well.
So if you get these, they actually come in a design like this and I would highly recommend using a hydraulic crimper instead of just like a force button crimper cuz that one will work. It just doesn't seem as secure as this one would. I'm sure it'll probably get by with both. Anyways, point is you get a two pack and these things are expensive.
This is like this pack of two that came in here. I think it was like nine bucks or somewhere on like close to 10 bucks with taxes or whatever. So make sure you get enough but also make sure you don't waste them. So first thing you're going to do is you're going to strip the Romex, right?
So the other end of this looks like this as you can see. This is six gauge Romex and it's a really thick on here. As you can see that. So what we did was cut about a quarter inch of this off uh maybe about closer to about half an inch and then you stick it in.
Oh, sorry. Don't mind that. Uh what you really do is you stick that uh the uh stripped wire in there and then you crimp it using a tool like this. So, I actually used the uh six gauge die here and then it uh didn't seem like it was that tight enough so I moved one size down and then uh crimped it even harder and that's why it has a looks like this.
So, one uh piece of advice is that there's like little tiny wings uh that stick out here. I just kind of cut them off and then try to round it off as much as possible, but uh you don't want to leave it like this. Some people put heat shrink tube on there. What I'm going to use is this.
This is a 3M electrical uh splicing tape. So, this right here is better than electrical tape. As you can see here, this stuff is super thick and it's not really a tape even though they call it like a splicing tape. So, just look how thick that is.
Uh this is self-adhering so it bonds to itself. What that really means is uh it's kind of like that uh emergency tape or like that uh self-adhering uh silicone stuff. So, it has got this backing here. I would just peel some part of it off.
If it gets a little bit challenging, easiest thing to do is just pull it out a little bit and then uh this part will not uh what do you call it? Stretch with it making it easier to pull off. So, it's got this backing layer and neither side is sticky. So, uh you don't have to worry about that.
So, what I would do here is that you stretch it out just a little bit, right? Don't stretch it out too much, uh but stretch it out enough so that you can get a tight roll pretty much on there, right? And then because it is self-adhering or self-bonding, you don't really have to worry too much about that, but the one thing I always do is whenever I get back to uh you know, closing off the tape, I always bring it back around, cuz you it does bond to itself. It will not bond to this here.
So, when you get down there, you get that little piece to bond to itself, make sure you roll it over itself, and there you go. Now, you have uh this piece uh well crimped. That's ready to go. We're going to do the same with this piece, which is Let's see.
Get some of this off just a little bit as you can see there. Uh it'll loosen up that backer or that little piece on there. Like I said, look not sticky on either side. So, uh what I usually do is go here, put this on there.
Make sure you get a good And uh the key to this is to pull it as you're taping it. Uh you can't just hold it, you know, non-taught, because that doesn't really do any good. So, make sure you pull it to itself, and then it really bonds to itself. So, as you can see, that stuff is really thick.
This is not your traditional electrical tape. I'm sorry, this camera is in a really awkward position exactly where I need to be to be doing this. So, it's pretty awkward, but I would make sure you get yourself some of this stuff, because this stuff is pretty good stuff here. Uh highly recommend this.
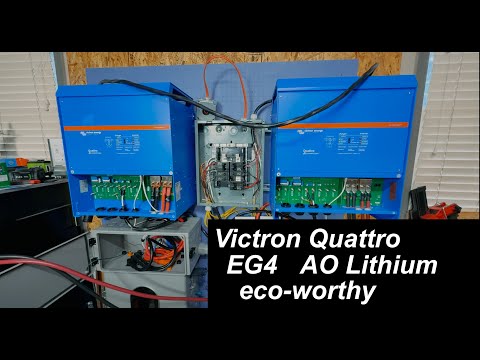
Anyways, uh that's how we would do. And so, we got, you know, the hot leg, neutral leg, and a ground. Going to make another one of these, and then we're going to go put it on the Victron. Victron Quattro 48 V 10 kVA, and the 10 kVA uh Quattro, not just this one, but several of them actually do not come with the spring-loaded clamps.
They actually come with these studs. Because of these studs is why we needed these ring terminals. So, as you can see here, the cable we made earlier, here it is, red cable, uh wrapped with the uh what do you call it? The splicing tape.
The white cable, which is the neutral, wrapped with the splicing tape. And then we have this ground. And this ground did not have a ring terminal put on it. I'm sure someone's probably going to say something about hey, you're not doing everything right according to code.
What, you know, sometimes you just make do, right? So, uh this one is is a uh solid core wire, so you technically don't need a ring terminal, and it's wrapped around this ground lug uh and bolted down with torque spec uh just like you would when if you're wiring up like a AC switch or even just an outlet. Because it's a core, a solid core wire, uh you don't need these uh terminals. Uh these were stranded wire, so they needed the terminals.
So, uh make sure you keep that in mind. So, on this one is wired up this way, AC one out. If you come across to this side, which is the secondary uh Quattro, you see same thing, except this one when we're using the color black as hot and then or line and then white as neutral, which is standard, and then the ring terminal here for ground. Uh we'll eventually get into just wiring up the whole system and everything, but uh I know there were a lot of questions, and even at myself at some point had a question on how you would do this, and that's how you would wire up these ring terminals.
So, uh there's other things you need to wire up in here before you get it going, uh but these cables are also really good. These cables look thin, but they're actually pure copper two aught cables uh with 3/8 lugs that are bolted down here. But, if you are questioning how do you wire up quote-unquote Romex or stranded copper wire to these uh lugs, that's how you would do them.