How to Install Ring Terminals on 6 Gauge Wire romex | Victron Quattro Wiring Made Easy 120v 240v
📝 Description
3M Splicing Tape: https://amzn.to/40dy5RY 6 AWG ring terminal: https://www.lowes.com/pd/Utilitech-6-Ga-Ring-Silver-2-Count/5014429279 Hydraulic Crimping tool: https://amzn.to/4egO8og In this video, I’ll show you exactly how to install heavy-duty ring terminals on 6-gauge ROMEX stranded copper wire — perfect for Victron Quattro inverter/chargers or similar off-grid and solar setups. We’ll cover: Choosing the right ring terminals for 6 AWG wire Why stranded wire requires crimped terminals How to use a hydraulic crimper for a secure connection The difference between light-duty and heavy-duty terminals How to seal connections with 3M self-bonding splicing tape Tips for connecting to Victron Quattro’s terminal lugs Whether you're wiring up solar power systems, off-grid setups, or just learning electrical basics, this guide will help you avoid common mistakes and build safe, reliable connections. 🛠️ Tools/Materials Used: 6 Gauge ROMEX Heavy-duty ring terminals (1/4" lugs) Hydraulic crimper 3M splicing tape 📦 Victron Quattro Model: 48V 10kVA – No spring clamps, requires stud connections 🔧 PRO TIP: Always torque your lugs to spec and use proper strain relief! #RingTerminals #6GaugeROMEX #VictronQuattro #ElectricalDIY #SolarPowerWiring #OffGridSetup #CrimpingTools #StrandedWireTips #VictronEnergy #diyelectrical
solarinverteroff-gridvictron48vdiy
🎬 Related Videos
📝 Video Transcript
Hey, what's guys? Welcome back to the channel. This right here is a Victron 48V 10 KVA quattro inverter and it's a 120 volt inverter. So, in the previous episode, we did a load test using this inverter, but we only used 120 volt loads, including, you know, induction cooktops and shop vacs and compressor and stuff like that.
So, if you're interested in that, go check out that video. But in this episode, we're going to dedicate this episode to getting a 240 volt load test on this uh Quattro 120 volt inverter. Uh so we're going to be combining 240 volts and 120 volts and then figure out how that works. So if you're interested in learning how we did a 240 volt load test on a 120 volt quad Victron Quattro inverter, stick with us.
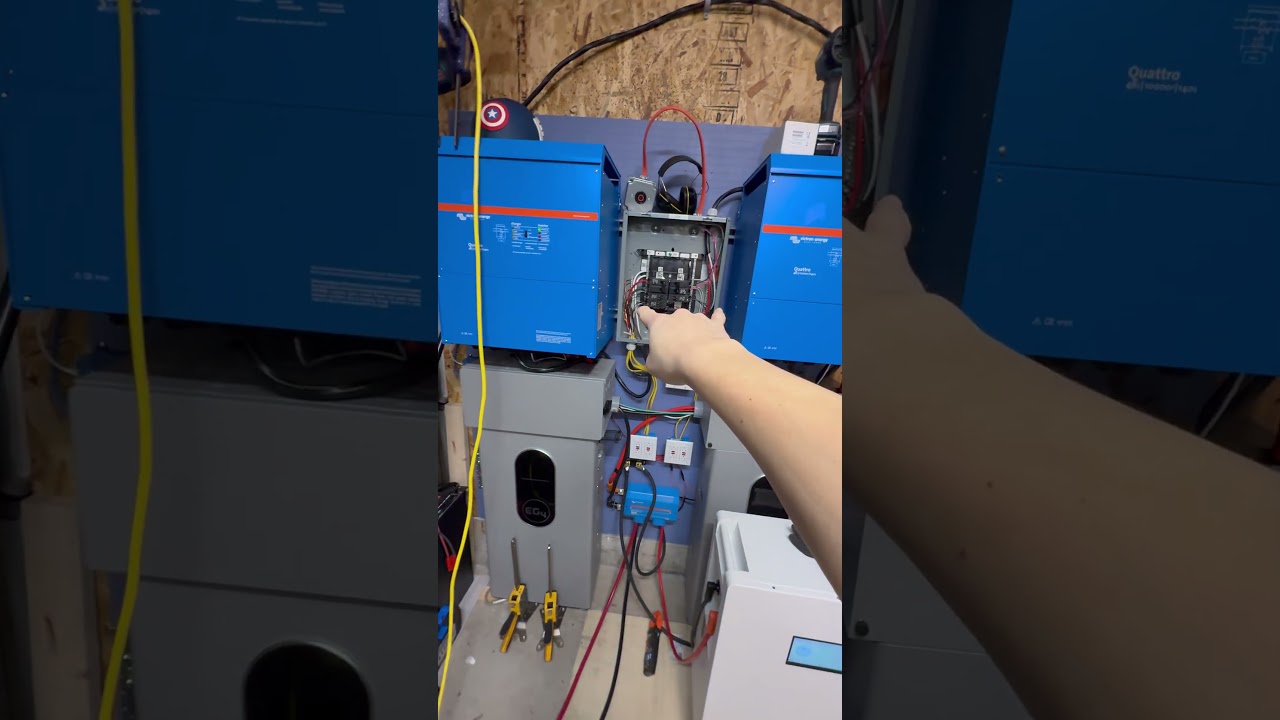
Let's go ahead and talk about the connections. And we're not going to go over every detail, but the important piece is uh just like the previous episode, we're going to talk about it more high level. So, this right here is a Victron Quattro. It's a 48vt 10KVA inverter.
This is a 120 volt inverter, singlephase. Right now, it's off. That's okay. Right now we have connected to I think it's AC1 or two out whichever one stays on when the battery is on using this ROMX cable comes out of this ROMX cable into this device here called the auto transformer and then this ROMX cable is a two so it's got two conductors and a ground so they call that like a two uh two a two conductor and a ground ROMX cable so it goes into here single phase so this right here is a Victron auto transformer and this is a very interesting device we have another video dedicated to this device.
So if you want to know more about that, you know, definitely check that out. But the interesting thing about this device is it can do many number of things. One of the things it can do is it can take 120 volt singlephase and create 240 volts split phase. Uh it also creates a neutral one.
Now many other things it can do like I said it can balance uh two uh 120 volts inverters. It can balance or it can take 240 and take it to 120. So all kinds of stuff. I'm not going to get into that.
But the important thing here is that we're using it for 120 singlephase and getting 240 split phase. Uh the other important thing you want to know uh from this is that it creates the neutral, right? Cuz you got split phase and it's got that neutral. The neutral current on this particular uh model cannot exceed I think it's like 30 amps or something like that.
Uh it can do 20 amps continuous on the neutral uh conductor but not more than 30 minutes. So just think about it as don't exceed uh 20 amps on the neutral. That's all you really got to take away from it. Uh the other thing to know about this device is that they make two models.
They make a uh 30 amp model and then a 100 amp model. This one here is 100 amp model. It means it can do 100 amps pass through. Okay, that's all that really matters.
So uh coming out of this we have this uh uh ROMX here which is a 21 meaning it carries two conductors. This white and this red and then this ground. I've added a third conductor here, right? Making it a three conductor and one, right?
Uh because we got 240 uh split phase. So, it comes out of there and it comes into this breaker box here. And as you can see right here, we got that same ROMX two conductors plus this one that's not in that ROMX sheathing. And then um the two hot legs feed into this breaker right here.
Two pull breaker. The uh neutral feeds into that neutral bar. and then the ground feeds into that ground bar. So, if you're not too familiar with the load center, how that really works is this entire metal casing is the ground.
You also have these ground bars that are a ground and then in one location right here, in our case, the green screw bonds the ground to this neutral bar. That's how that works. Okay. Uh so, we have this two pole breaker feeding uh pretty much these two legs here.
uh one feeds or the black feeds one and the red feeds the other one. And then the way that really works is that you see this here. This takes uh this is one leg. It skips this slot and then it goes over here and feeds that leg.
So if you have a two pole breaker, it kind of uses up two slots here and it connects to that leg and that leg. That's how the 240 really works. So if you want to look at it, you can say this leg, right? This one is technically connected to this one up here because it feeds that uh leg hot leg right there.
So, this one feeds 240 in. This is a 30 amp L uh 1530 out. And then it goes out two hot legs into that uh outlet right there. And then that right now is connected to a charge.
We also have, you know, all of these 120 volt single circuits that are in this breaker box from the previous testing. If you don't know much about these, these are what you call tandem breakers. You get two uh circuits in one breaker slot. I did uh move one around to kind of balance the load out, but we're going to see how that some of that load testing goes.
And then to the loads, what we have is um the 15 amp GFCI uh outlets. Each one is a home run to the breaker. Um and we're using 12 gauge ROMX on 15 amp breakers and 15 amp outlets. So that's perfectly okay.
I'm sure somebody's going to come along here and say this stuff isn't the code. That's okay. All this wiring isn't that great. That's okay because like I said, this is just for test purposes and they not plan to keep it this way permanently.
So before all the, you know, code compliant people come around, just make sure you take that in mind. And then for the loads, we're going to be using uh these induction cooktops and then that resistive electric kettle and also this charge verter 5K. So 5K means 5,000 watts. How do you get 5,000 watts?
This is 240 volt uh uh device. It can it can also be wired to do uh 120, but this is wired to do 240. So, we're going to be using this device to charge some batteries. So, let's go ahead here and flip the breaker or flip the BMS.
I mean, we'll flip the BMS. It's going to come on. Uh just so you know, all the switches are on. So that breaker is on and then that's on so that when it goes through its pre-charge circuit or pre-charge cycle, it pre-charges the inverter and then reduces all of the uh surge current.
All right, so as you can see right here, it's on. We're going to have to flip this breaker to feed the breaker box. Actually, no. Let's turn on this auto transformer, which has its own breaker.
As you can see, it's not on. Now it's on. We're going to go ahead and flip this breaker to make the circuit live or the the uh load center live. And now the load center is live, right?
So, how do you know the load center is live? Mainly because we can go ahead and probably flip these on. Let's go ahead and flip all of these on. And you can see all the single legs coming online.
And then we can also check this uh Victron uh touch 50 which is connected to the sero GX and right now it's using 1300 watts somewhere. So the question is what in the world is connected that's using 1300 watts. That's a great question. It's going to have to be one of these devices.
I don't think any of these are on. Maybe they are. We'll have to see. But you know something is taking up 1300 watts.
Uh let's go ahead and then start flipping on some of the loads. Actually, what's on right now is this uh resistive heater. Let's go ahead and turn that off. It's already getting warm inside this enclosed garage.
The important thing is let's go flip this breaker which feeds the charge verter. 240 volt charge verter. And how do we know besides me showing you a uh tester device that says this is 240? Well, you can only really get above somewhere around 1,800 watts on a single leg, right?
So, this is uh 5K. Well, technically, you know, you can do more than that, but let's go ahead and use this. We'll flip this is already on, as you can see here, this charge verter right now. We're going to let it slowly ramp up to about 100 uh amps.
That's how we're going to get close to about 5,000 watts. But anyways, as that ramps up, what we'll do is we'll just watch it right here. So, this right here is the Touch 50 connected to the Turbo GX. You can see it is slowly ramping up.
All right. After a little bit of a struggle later, I messed around with it. I changed the voltage to be a little bit higher and then I set the charge current to be uh 99. 2 or something like that instead of the 90 uh instead of the 100.
And that makes it seem it was able to jump right up to about 94. 1. So I'm not sure if you can see that right there. So we're charging at 54.
4 and 94. 1, right? You do the math on there. It should be somewhere close to 5700 watts.
So now we got 5700 watts being used by this breaker right here which is connected to this charge further. So just to show you that it is indeed coming out to 40. We'll go ahead and turn all the other loads off. And then you'll see right here it's still connected at 5700 or 5600.
What we can also do is get this clamp meter right here. Let me change this to AC and we'll try to put it on one of the legs right here if we can. As you can see right there, that one leg is pulling 24 25 amps. So about 25 amps per leg.
Uh you're going to be getting I don't I can't do the math right now, but let's just say somewhere around 5600 watts. Okay. So right now to reiterate, 120 volts coming out of here, going into here, 240 volts coming out and going into this charge converter. That gives you 5600 watts.
So now what are we going to do? Let's go ahead and flip on some of these breakers. Right. So, let's go ahead and flip these two breakers on, which I think hopefully will let us kick on one of these.
Uh, which one of these induction cook tops are on? I don't know if any of them are on. Well, that's on. So, that's pulling one leg or that should be somewhere around like 1500 watts for one of the legs.
You can see right here now we've jumped up to about 6,6600. Uh because remember this is now pulling uh 120 volt load. There's going to be neutral on the current or neutral current on the neutral. Right?
So now we have current on the neutral here being pulled by this. So, in order to balance it out, what we would really want to do is use a uh a circuit that is not connected or leg not connected to this one to balance it out. So, let's go ahead and turn one of those on. That one looks like it powered on this guy here.
We'll turn that on. We'll set the function to boil water. Hopefully, that one will start boiling some water. So, that's on.
And now, look at that. Now, we've jumped up to about 8,200. So, what else can we do? Uh, the best way to load this up is going to be at uh make the loads as balanced as possible.
So, we're going to take this resistive heater. We're going to plug it into this uh which is the same leg as the uh electric tea kettle. We'll flip this up all the way to about 99° while that one's coming up to temp. You'll see now we're pulling about 9500.
And there we go. I think we've technically overloaded the Quattro at 9500 amps or 9,500 watts. I guess that's especially what you would expect due to the fact that that's more than it's rated maximum because at a a cool room temperature it's rated to about 8,000 watts uh continuous and we were at 9500. So this one right here is saying it's an alarm because this one can only draw or put out 200 amps.
So 200 amps we've technically overloaded this battery. The BMS kicked in, kicked it out. That's exactly what you should expect. So that's how you would really get 240 volts out of a 120 volt inverter.
And you could really send the 240 into a load center and use 240 and 120. The only thing you really got to keep in mind is that uh on the neutral bus or the neutral current, neutral conductor, whatever you want to call it, you can only have 32 amps continuous. What does that really mean? What that really means is if you look at this box, you can really only have two uh 15 amp breakers at load.
So, if you want to use primarily 240 and just have a few 120 volt circuits, you could do that. I mean, technically, you could have as many as you want. You just can't have the total current on the neutral to be uh past 32 amps continuous, right? So, I mean, you could it'll just like break out, but you don't want that.
So, uh if you have a need for 240 and then you know your 120 volt uh loads are going to be low, you could technically get this 120 volt inverter and this uh auto transformer, but I would not recommend that unless for some reason you really needed this type of setup, right? So the other thing you could do is you could just get two have another one here and or one here and another one here and just have them both in a way do series into this uh breaker or load center so that way you can get full capacity of uh each one in there. And that's probably what we may do in the future. But if you know like your use case is very specific, you have maybe a lot of 240 and a little bit of 120, then you could do this setup and it'll get you pretty far.
So, uh, and if you're very cautious and maybe you're doing van life or, you know, bus life or whatever it is, or you just know your loads very well, you could do this setup. The point is it works. This is a really fancy and nifty device. I do not recommend this, you know, doing it like this mess that we did here.
But the important part is that the principle works. So, hopefully this video helped you guys out. If you want to buy any of this stuff, we purchased all of this stuff off from Signature Solar. So, just use the coupon code in the link in the description below or whatnot and that'll get you like 50 or 500 or something.
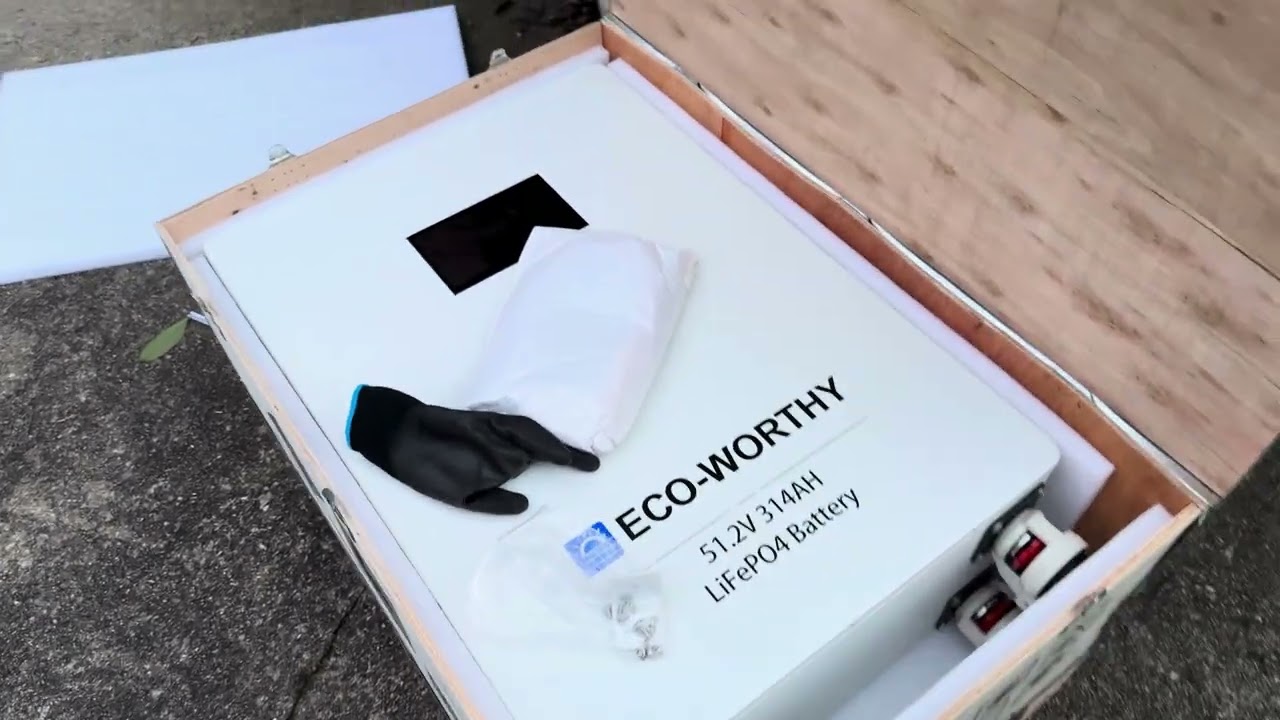
So, make sure you check them out, especially when they do free shipping because, you know, that actually saves a lot because this thing is heavy and I think this thing definitely has to be shipped freight because it comes in like a crate box. So, hopefully it helped you guys out. Have a great day. Let me know if you have any questions.
Get back to work and I'll see you guys next time.