
EG4 6000XP off grid Inverter long term Review | 8000W PV | 480V VOC | 48V 120/240V Split Phase
📦 Products Featured in This Video
EG4 Electronics
EG4 6000XP Off-Grid Inverter
Buy on Signature Solar →Affiliate link — we may earn a commission if you purchase through this link, at no extra cost to you.
Parts list for this build
Troubleshooting note from this video
Comparison that includes this video
🔗 Links Mentioned
Affiliate link — we may earn a commission if you purchase through this link, at no extra cost to you.
📝 Description
Affiliate link — we may earn a commission if you purchase through this link, at no extra cost to you.
Discount Coupon code ($50 off $500): GET50TGBATG
6000xp inverter: https://signaturesolar.com/eg4-6000xp-off-grid-inverter-split-phase/?ref=bkpkbxde
- Links are affiliate links to authorized distributors
1511090
#eg4 #inverter #offgrid #energystorage #energystoragesystem
batterysolarinverteroff gridoff-grideg4mpptcharge controller48v
🎬 Related Videos
📝 Video Transcript
mounting template, Wi-Fi dongle, battery communications cable, parallel communications cable, mounting hardware and manual. Hey, what's guys? Welcome back to the channel. On today's episode, I want to talk to you about this EG4 6000XP by Lux Power.
And in case you don't know what that means, it pretty much means this is a off-grid inverter manufactured by Lux Power, which has been making manu uh manufacturing inverters for a long time for EG4 and they call that one the 6000XP. Okay. So, this inverter can be rebranded um to other different brands, which actually we're starting to see right now on the market today. But Lux Power has been making this inverter or at least the hardware components for a while and they've deployed it across other countries.
Okay, so this system may seem a little bit new to you, but if you look up the Lux Power brand and some of the inverters that they've made, you'll see that it's actually been manufactured uh for quite a few years now in other parts of the world and deployed. So, you know, just make sure you take note of that. Anyways, point is this right here is probably the single most popular off-grid inverter that's currently on the market today. And there are a lot of reasons for that.
And we're going to go into all those reasons and all the bells and whistles and capabilities and all that kind of fun stuff. But I did want to tell you before we get into it. I've had this inverter since October. We've ordered in October almost immediately as soon as it came out.
We had to pay full retail price for this. Uh and we've had it since uh November. And um in no since we've installed it in November, it's been running part of the basement, parts of the house, but most importantly, it's been running a 24K BTU mini Pioneer heat pump mini split that's on our main floor and it's been working without a hiccup. So, in the winter times, we kind of run it in heat mode, right?
Heat up uh heat pump mode. But in the summer times, as it's starting to get hotter and hotter now, we're actually able to run it in cooling mode, and it has been working fine without a hiccup. And I believe we've had it for a little over 6 months. So, I think we can probably say we can give you our thoughts about this inverter.
And if you want to know if you should buy this inverter, stick with us. So, this right here is EG4 6000 XP and it is the top solution for an all-in1 offgrid solar inverter. It has up to 8,000 kW of PV input and 6,000 watts of splitphase continuous output. Um, it is manufactured by Lux Power.
It has remote access. It can do realtime adjustments. It has hassle-free firmware updates. It has live historical data.
And the EG4 model has a EG4 monitoring solution that is usable on your mobile device or via the web browser. Okay. This unit is stackable. You can parallel up to 16 uh of these units for about 96 kilowatts of total output.
It has built-in switching gear. It is a highfrequency inverter, meaning it is not one of those heavy transformer ones uh which there's pros and cons of that. We can get into that later. But it also has a dedicated generator uh uh connection.
This is a splitphase 240 volt in inverter at 6,000 uh kilowatts but or 6 kilows but it can only run about 3 kilowatts per leg. The MPPP efficiency is 99%. And if you look through the manual, it also has AFCI and GFCI protection on the MPPPT controller. Uh if you look at the error screens and stuff like that, there's even error codes for when those are activated.
This outperforms similar size competitors by a whopping average of 7% and it has a battery charging efficiency of 93%. Uh actually that's charging and discharging. And if you uh run this at idle consumption with the battery, the idle consumption uh running off battery is 50 watts. But if you connect it to the grid, it actually be gets more efficient.
And if you connect it to charging via MPPPT, the charging efficiency becomes actually more efficient with the idle consumption. Okay. Uh, this one has a internet dongle, but you can get a Wi-Fi 4G connection for it. And it is UL1741 listed, and it is IP20 uh, rated for indoor use only.
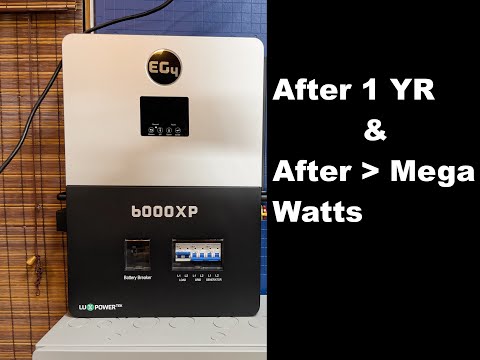
I did want to show the front part right here, which has a battery breaker. It's a 200 amp integrated DC breaker, and it also has uh, three other breakers here. Uh, one right here is for the load. This is a L1 L2, so 240 amp uh, breaker here.
And uh this is where you would connect your load up to this inverter, right? And this right here is a grid connection, L1, L2. And this right here is a generator connection. Uh before we get into it, I want to talk about the grid connection.
This is a 240 volt grid connection. If you're wondering if you can use this plugging in 120 only, you cannot. This grid must be connected to 240 hot L1 and L2 respectively. Okay.
I know uh people have had questions. seen people have questions if you can use this with 120 grid connection. The answer technically is no. So, we're just going to stick with that and you need to put 240.
Okay. Uh the second thing on here is this is a generator connection where you would connect also 240 L12 to here. And this generator function actually has a interesting function here. It has a 50 amp uh connection that it can support to the load.
So technically you can push somewhere close to 9,000 watts uh to the load about 5,000. I I got to go look at the manual specifically, but somewhere between 5,000 6,000 can be powered by the generator, right? And whatever difference that is not coming in from the generator. So let's just say you're pushing 5,000 from here and you got a 9,000 load connected.
Uh 4,000 will be supplemented by this inverter from whatever power sources it has available. So, it'll pull that 4,000 watts from the batteries or the solar or whatever you have available to bypass or push that 9,000 watts of of uh a load or or power to the load. Right? So technically, if you run it on bypass with the generator, you can run about 9,000 watts of load um through this inverter, even though the inverter itself is only generating or pushing about converting, let's just say DC to AC from batteries and solar uh to the loaf, we're at about 4,000 watts, right?
So if you set, like I said, 5,000 here and 4,000 from the batteries or whatever, you can push 9,000 there. Okay? So, it's probably set up where you could do that temporarily. I don't know if you want to do that all the time, mainly because it is a generator connection.
Uh, but in the manual, they call it generator boost and you have to enable that function. I believe uh that function may be off by default, but it is a function that is supported by this in case for some reason you had to run a larger load than 6,000 watts for, you know, short periods of time, then you could do that. Okay. And this right here is a DCPV switch.
Um, so right now it is in the on, but if you want to turn it off, you just go ahead and flip this to the off like so. And your PV will be disconnected. Okay. Uh, it's it's not sunny right now outside.
It's actually pretty dark and rainy, so I, you know, there's really no point of having it on, but I do want to put it on just in case sun decides to come back out here. Okay. So, this right here is a power switch to the inverter. Right now, it's on.
Uh, but if you turn it off, it'll turn off. All right. So, this is obviously the right hand part of the inverter, but if you're facing it, it's the lefth hand side. So, on this side, you get the uh Wi-Fi dongle that you connect here.
We have an entire video about this Wi-Fi dongle if you want to check it out. Um, and right here is a ESS power. So, it's either like energy storage solution or energy storage system. And this switch is actually inverted.
If you look here, the top uh the top part is off and you push it downwards is actually on. So, this switch is what actually tells the inverter to convert the uh DC power from, you know, your uh solar or batteries or whatever and send it to the load. That's what that button actually does. All right.
So, this right here is obviously the screen and there's a lot of information to go over. So, let's see if we can get into it. All right. So, uh this screen is not touch, but these four buttons here, capacitive touch.
Um there's a lot of information to flip through here and you can go through. Uh right now the PV that's connected it's saying it's. 37 kW of PV coming in. It's raining today and the sun is not really out but there is enough light outside to get some power coming in.
So the power is going to power uh this the load and some part of that power is actually going as you can see here to the battery. So the battery is technically being charged at 02 kilowatt and then the rest of it's really being used up by the inverter and also powering the loads. I do not have a generator or a grid connection connected to it. Uh but if there was, there would be more arrows and stuff like that happening.
But the important thing you want to take away from here is that when this face is normal, it's a happy face, it means everything is working as it should and everything's functional as designed. Uh there's like unhappy faces or fault errors and this this LED light will start blinking and all kinds of red will happen. Uh which means that there's error codes happening like that. Uh, so it's easy to tell just by looking at this light or looking at this face if everything's working properly or not.
But that's pretty much what goes on with the screen. This little percentage icon here is usually what tells you the percent load that's that this uh inverter is putting out. Uh, we have another video about this inverter and the indoor battery where we've been testing uh the inverter at 91% load for a good like hour or two. Uh, that one seems to work fine.
And this is inside the connector box for this inverter. I've already cut the power and stuff so it's safe to be in here. But if you're ever in here, just double check uh to make sure that everything is safe because this is high voltage DC and it can kill you. All right, so with that being said, this orange cable here is the battery communications port.
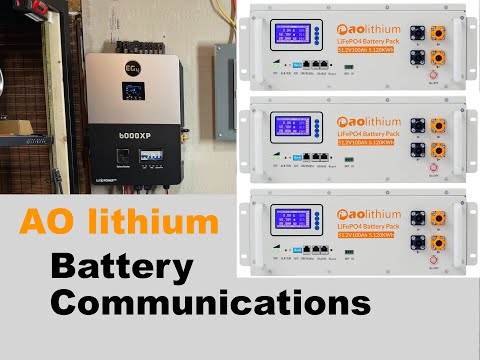
Um, if you are using communications, you don't have to, but this far left port here is the uh batterycom's port. There's other RJ45 ports here you can use for parallel connections and all kind of fun stuff. There are dry contact ports here. So if you could you connect uh dry contact for a generator connection, rapid shutdown and other functionalities in case you did want to use that.
This right here, like I said, is the DC rated battery breaker. And these are the cables. I'm using two watt cables to connect from the battery bank to this inverter. And if this looks a little bit different to you, it's mainly because uh this, like I said, I bought it when it first came out in October, or I don't know when it first came out, but we bought it really early in October.
Um, and then by the time we received it, it was probably like Novemberish or whatnot. But this is probably the first few that they shipped or maybe the first batch before they changed it up, right? Because uh the biggest difference for me right now is that these two connections are actually screws that you screw in to the board and then um you know torque to spec whereas the newer ones now have lugs that stick out and you can connect the battery cables on those lugs. Okay.
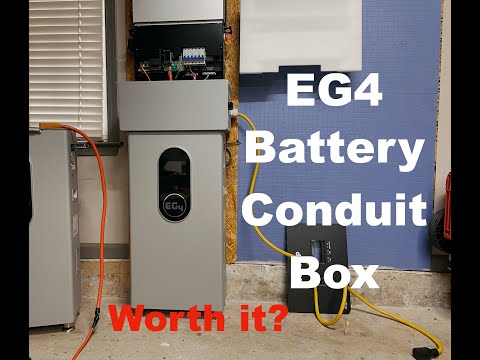
The other difference uh is that the newer 6000XPS have the knockouts um a little bit different or arranged differently so that it supports the conduit box they sell uh for the 6000 XP and the indoor battery. Okay. So, uh if it looks a little bit different, those are the main two differences that I noticed um from the newer 6000XP and this one. Uh so, you know, just moving on.
It's got, like I said, the CH&T uh NB1-6350 amp or 50 Hz breakers right here. Uh so these are DC rated breakers and these are rated for copper only. So if you're trying to use aluminum wire, don't do that because you know aluminum wire is just not good to begin with. But make sure you use uh copper wire.
Okay. So this right here is your grid connection or uh the load connection. Um, I have L1 and L2 that goes into uh the the load center. And the neutral bar is actually down here.
This bar down here is the neutral bar. And then this bar right here is your protected earth bar here. Okay? And if you are using the conduit box, you do want to ground the conduit box to this bar here.
Okay? Um, I don't see everybody doing that when I see some other people's, you know, installations, but I do recommend you do that because you want anything that is metal, which this is metal. Uh, the conduit box is metal and the indoor battery is metal. You all want that stuff to be connected to ground.
This right here is your generator contacts. Uh, you know, it's pretty straightforward. These three seem to be almost exactly the same, but I'm not using these two. Uh, right here is where your PV connections will be.
Um, you'll see right here PV1 and PV2. Uh, I have I think I think this is 10 gauge wire connected with pharaohs inside of here. It's pretty straightforward. There is another tracker in here I am not using.
And in case you need to use that, you can do that also. All right. Uh, when I first bought this inverter, um, it didn't come with these grommets. Uh, so, you know, these grommets, uh, you're going to have to get separately.
And I believe even right now if you get the newer inverter, it still will not come with the grommets. Okay, so these grommets I came off of my 6000XP and seems to work fine here. I need to get another one here, but I'm going to swap this whole thing out and rebuild the entire system with the indoor batteries. So, no big worries there.
Okay. Uh, all of this stuff here, this black piece here is plastic. So, don't think that it's metal. It's plastic, hard plastic.
This right here is also plastic. is really designed to help protect and move some of the air flow going in and out of this inverter. Um, if you want to know how the air flow works, there's fans on this side of the inverter up here, right up there, that pull air from across coming in from this side, the right side to this way. Okay?
So, that inverter actually gets cooled. Air's actually sometimes gets sucked in through like, you know, these holes here and kind of all cools it down. But that's how the airflow works inside of this inverter. All right.
So, this right here is my load center. And this load center is a Square D load center. And before we get too far into it, I want to throw up a disclaimer. Uh, you know, this is just what I'm telling you how I have it set up.
Also, I'm going to try not to touch anything even though everything is off at the uh inverter and any of these connections have no power. I've already checked it with a multimeter, but I just always have a habit of not touching stuff if I don't have to. And I want to keep that habit. So, I'm just going to try to point to it if possible.
Okay? And I I suggest you also adopt that habit. All right. Anyways, uh this right here is a square D uh load center that I picked up at I think it was my local hardware store.
And when you pick these up, make sure you pick up the matching uh ground bars that go inside of your load centers mainly because most of the load centers will not come with the grounding bars in the load centers. U so you do have to pick them up separately. Okay? And the reason you need to get those is because um these right here are ground bars.
And you want to connect all your grounds to the ground bars, which is then also connected to this uh load center metal. This is all metal. Okay. And when you get the load center, there's usually a big uh green screw that you can place somewhere in your panel that bonds this neutral bar to the ground.
Okay. In my case, I do not have it bonded here, mainly because the bond in my system is happening inside of the EG4 6000XP as we talked about earlier, right? So, I don't have that green screw that would normally go, I believe, right here. Uh, but I did have it there at one point because the 6000XP did not have that bond.
Okay. So, if you're using not the 6,000 XP, the 6500. So if you have a inverter that does not automatically detect or create or uncreate its neutral ground bar, make sure you know what the system is doing and then put the ground bond bus uh bond the ground to the neutral if you need to. This load center is powered by the 6000 XP using this black cable here.
This black cable is a ROMX S. So cable and it has three conductors, one, two, three, and a bare uh ground. Okay. So, um right now each one of these uh cables or each one of Yeah.
each one of these wires is providing a hot leg. So, this black one is connected to this breaker and this red one is connected to this breaker. And um both of those hot legs are in this breaker and just imagine this breaker is here. So, technically this black one is powering you know this leg and this red one is powering this leg.
And that's how you get 240 inside of a, you know, US-based 120based system, right? So, um, I did see a question when I was trying to find a 40 amp breaker. And yes, this should be a 40 amp breaker, but for some reason, my hardware center didn't have 40 amp, so I just got the 50 amp one. It should switch it out.
But if you are using it with 6,000 XP, get a 40 amp breaker. Okay. Um, I saw a question when I was looking for the 40 amp breaker. Somebody was asking if they could use this type of breaker inside uh your load center to get 240.
The answer to that question is a no. I believe this uh type of breaker is what you call like a tandem breaker. And this breaker even though it has two switches here is actually only um it's actually two breakers inside of a standard breaker slot. Right?
So a standard breaker slot looks like this. Right? So just imagine this would be like one breaker slot. Um, but inside of these tandem breakers, you really have both circuit breakers.
It's really like two slim breakers just wired, you know, slapped together. Um, and then they actually are separate. So, if you connect 240, if you think you're connecting 240 into this, right, you're only putting your all your power into one leg of the bus. So, the answer to that question is a no.
Make sure you get a two pole 40 amp breaker for your needs. Okay. So, uh that's how this load center is being powered. And I would suggest most people who are doing this, make sure you power I would try to power all your load on one side and power on the other side.
Mainly because it just makes it easier and keeps it simple, right? So, eventually when I rebuild the system that it'll be set up a little bit differently, but this right here is uh 240 power coming in and everything on this side is power going out. So, this right here is a GFCI uh in the basement. This is another GFCI here powering lights and other stuff.
Uh, but this breaker right here, which is another two pole 30 amp breaker, is actually powering the 24K BTU minit going out through uh this 10 gauge uh ROMX cable that goes to the mini split. Okay, so uh that's really how the load center is going to be wired. If you're going to be powering your house or other units, you're obviously going to have more breakers and more connections than wires, but in this case, I do not. So, that right there is a 6000XP in a nutshell.
Okay. And you can probably see why that this is the single most popular single unit inverter that is currently on the market today for off-grid applications. First of all, it can do 240 on a single unit. You don't have to have two units to do 240 split phase.
It's a single unit that provides 240 even though it's only 3,000 uh watts per leg. Okay. Secondly, it comes with pretty much all the disconnects, breakers, and switches and stuff that you need to get going. Usually all of these things each individual component is going to be somewhere around like 50 or 60 bucks some 40 a bucks all kinds of stuff and you have to it will just be more complicated to wire up right you have to get boxes put the breakers in the boxes all that kind of fun stuff whereas in this case it's all integrated as one okay it's got battery communications which almost all inverters do these days or at least the ones that are you know trying to put together a whole system and that seems to work pretty much perfectly out of the box and in my case I will say all of this as I set it up uh started working immediately absolutely perfectly outside of the box.
Have had no issues with the power or the charging or anything related to the inverter in terms of its functionality. Okay. We did however have a lot of issues with the Wi-Fi and getting that going. Um and we had to reset the Wi-Fi and also the inverter and all kind of things uh over several days.
So, uh that was a trouble in itself. But I do want to point out the inverter was able to work perfectly without the Wi-Fi connected. So, if you're trying to go off-rid, right, and not be connected or connected to the internet or any of that stuff at all, you can use this inverter perfectly without the Wi-Fi dongle being connected and you don't have to worry about security or any of that stuff, right? But if you're not trying to go, you know, completely off-grid, right, in terms of like traceability or any of that, then I would suggest using the Wi-Fi dongle because you can use the app or the uh web application on the internet to control the settings of the inverter and also log the data that's there.
Right? So, this inverter once you have the Wi-Fi dongle connected will log the data into the EG4 monitor website and you can see pretty much how much you've produced, how much you've consumed, uh the specs, change settings, and all of that using that. So, it's been great to have that. And I do want to shout out to some guy named Marcus again over at EG4 to help me get that going because after several issues with uh getting it going, actually getting help from um them was actually really helpful.
So, I you know, I can't say that it wasn't terrible, but it does actually help. And I really do appreciate Marcus uh from EG4 Electronics helping me out. Or maybe it was from Signature Solar. I can't remember, but some one of those guys uh the guy from one of them places was able to help me get it working.
I do appreciate that. There is a video on the struggle. And if you want to know how to get Wi-Fi working or if you're having issues with it, go check that one out. But like I said, for me in this case, for this application, which is this EG46000 XP connected to a battery bank and a single ray of solar powering pretty much the main floor uh mini split, um also the lights and stuff going inside of this basement.
Um everything is perfectly fine. I've had no issues. I am going to rebuild the system to make it a little bit more powerful and stack maybe two of them to try to get more of the house loads on the panel to get more off-grid uh to get that going. But for this system, like I said, been working perfectly for over 6 months.
I've had really no issues with the capabilities or performance of it. I would highly recommend this system. Okay, so if you had any question like that, let us know. Otherwise, have a great day and we'll see you guys next time.
Heat. Heat.