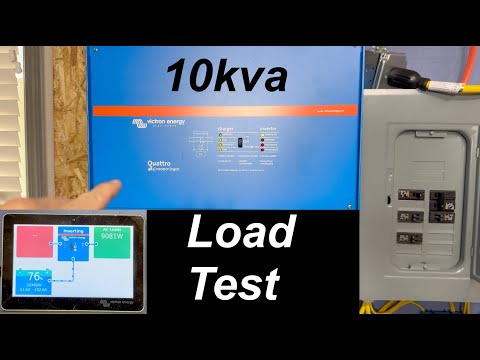
#victron Quattro 48v 10kVA Inverter Charger setup | #eg4 Wallmount #lifepo4
Comparison that includes this video
🔗 Links Mentioned
Affiliate link — we may earn a commission if you purchase through this link, at no extra cost to you.
📝 Description
Affiliate link — we may earn a commission if you purchase through this link, at no extra cost to you.
Discount Coupon code ($50 off $500): GET50TGBATG
Victron Inverter: https://signaturesolar.com/victron-quattro-inverter-48-10000-48v-input-10000w-output-120v-140a-charger-transfer-switch?ref=bkpkbxde
In this episode, we take a look at the Victron Quattro 10 kVA inverter charger. This inverter charger is designed for upgrade use impact a series punch. It is not launched by any means with the specs and it's capabilities and also weighs with all construction and low freaking transformer weight. This thing is no slouch and expected to last four years to come. Being a low frequency Transformer is able to keep, delivering under high peak surges and expected to last a lifetime.
Victron Quattro 48/10000 | 48V Input | 10000VA Output 120V | 140A Charger | Transfer Switch
The Quattro by Victron, much like the MultiPlus, combines the technologies of an inverter and charger. Additionally, it can accept two AC inputs and automatically connect to the active source. It shares many traits with the Multiplus, such as acting as a true sine wave inverter, adaptive charging, hybrid PowerAssist technology, plus multiple system integration features.
Key Features:
Two AC Inputs & Outputs
Automatically connects to the active source.
Unique PowerAssist - Prevents overload of a limited AC source.
First, battery charging automatically reduces.
Second, shore side supply will be boosted with power taken from the battery.
Parallel up to 6 units
Split Phase or Three-Phase capable.
Remote Monitoring and Control
Access can be from a phone, tablet, laptop, or PC for multiple operating systems.
inverterchargervictronquattroautomaticallysourceactivebatterychargingcomdiscordexpectedfeatureshttpsinput
🎬 Related Videos

📝 Video Transcript
This right here is a Victron Energy Blue Power Quattro and this is the 48vt 10 KVA model and this is an inverter charger. Uh they do make this quattro in other uh configurations like smaller VAS, different voltages here. But you know the biggest difference between this quattro and a multiplus2 which is also popular is uh one the quattros usually have two AC inputs and then two the quattro usually always have a higher volt ampers rating or the capability or power output rating. uh that's not the only thing that differentiates them, but those are the two major things that everybody kind of accepts and takes away from it, right?
So, this is the nicest inverter I think that we've ever had the privilege to use and work with. And if you have the possibility to go work with one, use one, see one, touch one. Um I would highly recommend you go do that mainly because it's one of the nicest inverters I think I've used. And you will be working with it thinking, "Wow, they did a really good job with this.
" Obviously, you know, if it's not yours, don't touch it. If it's on, you know, touch with caution or don't touch it at all. Anyways, point is we're going to go over this uh inverter top to bottom and go over some of the stuff it can do. Not everything cuz that video would be like 8 hours, but uh we'll go over some of the basic features of it and how we plan to use more of it in the future.
So, if you want to know more about this Quattro, stick with us. First things first, let's go over some of the specs. First of all, like the Quattro, this has a two AC input system with an integrated transfer switch. Some people would call that just using a relay, but pretty much the two AC inputs uh work.
And then it has pretty much a no brick functionality for the main output so that the inverter can really take over in less than 20 milliseconds. That means all the computers and stuff like that, you know, will work perfectly like sensitive electronics. Uh you can put two units in splitphase or you can put three units in three-phase output. But you can also parallel many of them to get up to 120 kVA of inverter power.
That's right. That's 120,000 volt ampers of inverter power and more than 1,600 amps of charging capacity. So that is obviously going to be a lot if you had you know that much. But if you're doing that much energy you're consuming or whatever that much energy, you probably already know what you're doing.
So, uh it has other capabilities like power control uh which you know deal with the limited AC that's going to be coming in. We'll talk a little bit more about that uh later, but there's power assist. And obviously with the inverter charge systems like this with Victron, you don't have an MPPPT or a charge controller. So, you will have to get that one separately.
All the on-site or remote monitoring stuff are going to be have to be done through either the Victron Connect or the uh VE bus or some type of uh VRM type device. We have a serbo connected. We'll talk about that in just a little bit. But now let's get to the actual specs.
So this model which is a 10,000 KVA model has one two AC inputs and it has a maximum feed through current of about 100 amps. uh the continuous output at 25 degrees Celsius is obviously rated at 10 KVA, which is kind of how they, you know, name these inverters or spec these inverters. But if you want to convert that into watts, that's 8,000 watts of continuous output. If you get a little bit warmer and you're working at 40° Celsius, that's about 6,500 watts of continuous output.
And then at 65° C, uh it drops down to about 4,500 watts of continuous output. And this is like almost all Victron inverter charger systems is a low frequency transformer-based inverter. And due to that, it can take a maximum peak power or high peak power, I mean. And the maximum peak power this thing can put out is about 20,000 watts.
That's right, 20,000 watts. Not 2,000, but 20,000. Uh the maximum efficiency on the system like this, you're going to get about 96%. And if you're talking about idle consumption, that's going to be somewhere around 60 watts.
If you put it in like AES mode, that's about 40 watts. Or if you want to put it in search mode, also known as eco mode, you would get about 15 watts of idle consumption. Obviously would not recommend that mainly because, you know, uh it has some quirks to it, but if you want to use that, you know, go for it. The uh auxiliary output is rated at about 50 amps.
And this thing uses the uh bolt system. So if you wanted to install the terminals and stuff like that, instead of like a spring or a screw down type system, it uses the bolt system. And those bolts are M6. And this thing is not light by any means.
It weighs a whopping 128 lb or 58 kg. And the dimensions, as you saw in the uh video earlier, it it's actually pretty big. It's about 22. 6x 19.
2 by 13. 6 in. So, you know, that's actually pretty big. It's got a lot of the anti- islanding uh other features and stuff like that built into it depending on the model you get and the area that you get it from.
So depending on if you need that kind of stuff or not, go look at the uh website for uh wherever you're buying it from in the region that you're getting it from because depending on which ones you get, uh it may or may not have that feature. First, let's talk about installation. And we'll go ahead and say installation is no joke. As you can see, uh we have the super strut kind of going this way.
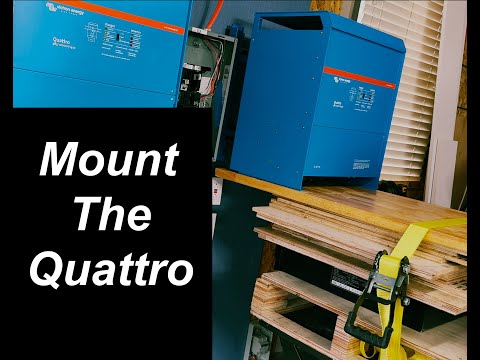
And then the way that this system works is kind of like most Victron systems. And there's like a a bracket that you install. Uh if you use Multiplus systems, you know, you install the bracket, then you put it on top of the bracket. This has a bracket uh a big bracket obviously considering how heavy it is.
And um there's a metal piece that sticks out. So you want to lift it, put it on there, and then screw it down so it doesn't really come off. In our situation, we've installed the bracket on the unit on the super strut there, and then we've installed this into place. And that was no easy task.
Uh if you have a tool to help you do that, I would highly recommend that, especially because you're going to be putting yourself in danger just trying to get that on there. And it was, you know, not easy by any means. Front of the inverter has pretty much this graphic drawing that kind of tells you how everything's connected with the relays and stuff like that. Obviously 48 volt 10,000 K or 10,000 uh VA for 140 amp pass through and charging you can really get with some of this.
The transfer capacity is actually listed here. So this is really technically the charging capacity. So, the charging specs are listed here, you know, depending on which phase of the charge cycle you're in. And then the inverter parts listed here.
If you look at the Serbo GX or the screen, and you kind of see this the dots on there, that those dots are actually exactly what's going on on here. And we'll go ahead and take a look at that a little bit later. But you can go ahead and get the front of this off by taking off the four screws, which obviously we've done. So, we'll remove that.
And then once you remove those screws, you can really get in there and then look at the connections. So here we have the inside of the inverter charger and this is safe to touch mainly because this has been off for a while and you know all the energy has been discharged but I would not recommend touching any of this in any situation. I just know that this has been off right. So here is the AC1 in the ground uh connection is here.
The AC2 in ground connection is here. AC1 out ground connection here which is shared between AC2 in and AC1 out. AC2 out is right here. So the AC2 out the ground connection is here.
And as you mentioned earlier, uh if you're used to other, you know, high frequency inverters that have the screw down terminals, this is the bolt type terminals. So the main big difference between uh working with it is that when you install this type of system, you really need to get the rings uh terminals so that you can terminate the cables with the ring terminals and then screw them down. Because on the other screw down terminals, you can either put fererals on them or some type of sleeve on them such that you know the wires don't go everywhere. But in this system, ring terminals, uh there's obviously a lot of this stuff has been glued down to prevent any uh vibration stuff if you were to install this in some type of vibration system.
So that's obviously really nice to see. And here we have the battery connection. Obviously the screw down lugs and here right uh this right here is installed with two uh two odd cables, negatives here, positives here. This white cable is the VE bus connected.
We'll take a look at that shortly or I'll just throw up a picture of where it is, which is right here. Uh, but the other thing I'll point out, which obviously you can see here, is that it's very interesting how they decided to put the other terminals back here. Like for instance, if you wanted to use the ground relay terminal, which is actually this one right here, or the Vense terminal, which is actually this right here, uh, it's going to be pretty difficult to get to, mainly because the battery cables are going to be blocking them. So yeah, I'm not sure why they decided to do that the way that they did, but I imagine that's going to be frustrating for many people.
Not only just to get the wire there, but imagine doing like wire management there. So, you know, uh I would, you know, maybe consider that or maybe routing the battery cables in some different manner or something, uh if you needed to use those terminals because the battery cables are going to be blocking your access to there. Wanted to show you the bottom of the Ver charger real quick. And as you can see right there, that right there is a bracket.
Uh the bottom part of the bracket that sits on. It's got three big fans. One, two, three, and it actually blows air upwards through the transformer and all the other stuff that's in there. And it's nowhere nearly as much stuff as a high frequency inverter.
And then it comes out the top. We'll go ahead and take a look at that in a little bit. But the three fans are actually uh pretty quiet. So when you run this thing at load, you won't actually be hearing that many fans.
You actually probably be hearing more of like the low frequency hum or buzz from the transformer. But that's there to ground the inverter. The grounding is uh lug is right there and you definitely want to make sure that gets grounded. All right.
So, coming around to the top here, you can see it's designed. You can use this part as a handle if you need to, you know, but if you're going to lift from here, I would highly recommend using gloves cuz this part here is a metal edge. As you can see right here, the grate system is here such that the air can flow through and come out. Um, so the air flows from bottom up and then also comes out here.
So, make sure you leave clearance for this stuff when you mount this thing. Mainly because, you know, you don't you do want to be able to breathe. It doesn't move uh a lot of air in high velocity, but it does move a good amount of air. And the good thing is that it's silent.
So, let's talk about some of the connections we have going on here real quick. And we have just a basic connection so that you can we can kind of demo and do a little bit of a load test on here. Right. So, the uh obviously right here you have two two A cables connected to the battery lugs here.
The red cables are two two out cables. Also, they're positive, so they're connected right there. This white cable here is the VE bus connection, and it's a standard Ethernet cable. There is nothing special, no special pin outs or anything like that.
Standard Ethernet cable that connects to one of the ports, any one of the ports. There's two here, uh, that connects to one of that and it connects down here to the Serbo GX down there. And here we have, uh, I believe it's six, uh, six gauge ROMX here. The black is hot and the white is neutral.
And then you got this ground wire here that comes out obviously back through here into this load center right here. And this load center, uh, we'll talk about that in just a little bit here, but that's where the power is going going to be going out of there. If you wanted AC in, you could connect AC in, put it in here, and that way you could charge it and use this to charge the system. Uh, we actually don't have that right now because the battery's already been fully charged so many times.
Uh, don't need to worry about that. So, uh, with that here, let's go ahead and talk about this battery box. This battery box is the first generation indoor wall mount conduit box for this battery. If yours looks different or if the one on the website looks different, I would say uh, it's because you probably have a later generation of this whereas I have the first generation one.
So, the first generation one, you open it up and it looks like this. The battery cables come down here and they have a quick connect type system. It's a Dexon system, so you just push it on and it connects. Uh there's four uh connection points here on a bus bar.
Uh I think it's like a 600 or 400 M rated bus bar, but you know, that's pretty fine there. The positive ones also have the same bus bar system. So you connect there, no problem. uh the system ground, the bare copper wire that you in that you saw earlier that was installed to the lug that was back there actually comes down here and connects to this grounding lug right here which connects pretty much all the metal pieces.
The battery uh this uh conduit box which is metal and the frame of this right all the metal pieces are connected uh to one point here and even this door which is metal is still connected with this cable here. So that's how that works in there. uh that's a little bit more of a mess because you know we had to rearrange for different projects. But it's got this blue Ethernet cable here which connects uh from the CAN port of this EG4 indoor wall mount battery to this Serbo GX.
Uh and it is not your standard Ethernet cable. We have a video on how to make that custom cable in case you need to do that or you can just pick it up or buy it if you need to do that too. Uh but this right here is EG4 wall mount indoor battery. It's like a 14.
8 8 I think kilowatt hour battery uh wall mount and this battery I believe as you can see I think is actually perfect for this system because you have it mounted to the wall with the conduit box and all the cables can kind of go you know short-handed here I didn't want to punch additional holes in here so uh like I said I've already used this this battery and this system for the 6000 XP and other inverters uh so if you're only installing something one time permanently obviously you can just punch out the holes right and make it you bridge this gap closer, but uh in our case since we've kind of, you know, change out systems, stuff like that. It looks a little bit messy here, but you can obviously, you know, decrease that uh gap. So, this right here is a load center. Right here is a six gauge cable coming in through here.
And like I said, everything's off, so it's safe to touch, but I would highly recommend you do not touch. Uh so, this ROMX cable comes in here. This black one goes to uh this 50 amp breaker, which is actually great for this inverter. And then the white one connects to this neutral bar.
If you don't know what the neutral bar is, it's this bar that kind of goes all the way around. And then uh the ground cables connect to this ground bar here. Uh in a lot of cases, if you pick up load center, the ground bars don't come with them. You do have to pick them up separately.
So if you're picking this up at your home center, make sure you pick up the ground bars for your perspective panel. Okay. Uh also in here we have the ground neutral bond which is plugged right here that green screw which bonds this p uh frame to this neutral bar right and then because the frame is also connected to these ground bars these ground bars are now technically bonded at this point and that's what you really want because in any electrical system type like this you really want one point of ground and that's how this is set up. So, uh, the power comes in, feeds through this breaker.
And right now, because we only have one, only this bar right here or this lineup is energized. So, uh, the power comes in here, it feeds this bar, and this entire thing right here is energized. You could technically also pull power by putting a breaker here because it'll connect to this point here, but I'm just going to be using this for now for this demonstration. Uh this breaker right here is a 20 amp breaker connected to this yellow ROMX.
So the yellow ROMX I think is what is it like 12 gauge the 12 gauge ROMX and the black is hot here. Obviously the ground and neuter are connected here and this right now will feed this uh GFCI uh outlet right here. Um and I do apologize for the mess. Uh, I'm sure someone's going to point out not everything's done to code, but you know, this right here is only set up for this demonstration and not to be installed here long time or permanently.
And, you know, we're always moving these components around. So, anyways, uh, that's how this is connected. So, we'll go ahead and flip the power to uh, this to make it come on. And the way that I've been doing that is to be able to go ahead and turn this here to uh, off position.
That way, uh, the inverter itself is off. We'll go ahead and flip the breaker to the battery that's there. So that way when the BMS powers on and it goes through its pre-charge cycle, it'll go ahead and slowly feed uh the power into here and then everything will be live. So after we turn it on, don't touch anything.
All right. Obviously, we'll have to flip the breaker and stuff like that. So I'll just go ahead and do that now so I don't have to even reach in here as we do this. So here, we'll flip that breaker on.
We'll flip that breaker on. And we'll go ahead and flip the BMS uh or power button to the battery. Battery's gone through its pre-start cycle. We'll go ahead over here and then turn on the uh the switch to on.
So if you switch it to on, it'll be in charger and inverter mode. If you want to not use inverter mode and only charge, you flip the switch down and it goes to charger only mode. So go ahead here, turn the switch to on. There you go.
As you can hear, it's kind of got that low frequency buzz. I'll get the mic closer up there to see if you can hear it. So hopefully you can hear that it's got that low frequency buzz. And as you can see right here, the green light here comes on saying the inverter is on.
So this demonstration obviously is not going to be drawing peak power from here. Mainly because we only have one uh of these connected. Um, I guess technically we could could connect the other one here to draw more power, but if it works, it works. Okay, so right now you can see power is going to be feeding into the main panel or this panel, which is going to be used as the main panel to this breaker here and this breaker here feed power coming out.
You probably can't see it too well right there, especially due to the lighting, but this green light here is on. And because you can't see it that well, we'll go ahead and take this uh outlet tester, stick it in here. Tamper resistant outlets. As you can see right there, the two light, the two LEDs here are on.
And if you look at the configuration here, it says it's technically correct. So, we'll go ahead and get a uh a load connected here. That way, we can draw some power. As the heater's getting worn out, let's take a look at this battery.
If you haven't seen this battery, there's tons of videos on this battery. We also have one, too. So, if you want to check it out, go check it out. But, as you can see here, assuming you can read it, it says discharging right here.
We're discharging right now about 30. 5 amps. That's the voltage of the battery. Uh, and right here I've set the CAN uh, port to be P 06 VCT, which is the setting that you need to connect the CAN bus over there port to the Serbo GX here.
And since we didn't get a chance to look at the Serbo GX too much earlier, let's go take a look at that, which is this guy right here, which is the uh, monitoring brains of the system. So, we'll bring you in just a little bit closer. And as you can see right here, Serbo GX. This is the power cable for this.
We're actually just powering this off with just some battery here. Uh, but this is the BMS connection. Uh, that's the port right there back in the back. And this white cable is the one that's connected to the Quattro here.
And this is the HDMI cable with the Ethernet plug right here connected to the screen. The screen you do have to buy separately. We have the Touch 50. And this right here is a touch 50 from that HDMI cable.
So this red box is the grid connection. And obviously we don't have any AC connected in. Uh so you're going to see nothing right there. This is obviously is the inverter that you have.
If you have multiple inverters, it's going to be like, you know, collection of inverters. Uh right now we only have the one connected here. And then this right here is your AC load. So technically this should be the uh the breaker box or main panel.
And this right here is the EG4 indoor wall mount battery. And as you can see right there, even tells you the wattage, the voltage, and the amps coming out of it. Um, as I mentioned earlier in the beginning, you see the dots right here. The dots right there are reflective of the LEDs that are on front of the Victron inverter.
And I'm really glad that, you know, Victron did this. Uh, mainly because if you have the inverter charger tucked away somewhere, you can't really see it. But if you look at it here, you can see it without looking at directly at it. So that's working great.
Here there's another view. You can look at it this way. Um, or you can just go back and look at it this way. Or since you have uh other sections connected like BMS uh EG4 LL battery here, this stuff here, if you get the connection, the communications working, all the great features come out in here.
And that's why I would recommend um if you're going to use or build a system like this, I would get the EG4 indoor wall mounted battery because I know that the communication works fine. And it also, like I said, profile-wise, profile-wise, it fits almost perfectly uh with the battery. Anyways, point is you get the EG4 LL battery here, Quattro, and the state of inverting. You can go and see, you know, all the other specs in here.
We don't need to go too much detail into that. You can go look at the battery voltage, state of charge, temperature, devices, alarms, parameters, all that kind of stuff in case you wanted to check that. uh other settings in here of like you know this other system, datetime console, remote system, ESS portal, all that kind of stuff. So there is an app and you can connect to the app to look at it or you can also just go to the VRM portal online if you've connected your Serbo GX to the internet and it'll push, you know, uh online uh stats there and you can go manage your system from there.
But in this case, the point is that everything really works well right here. mainly because you can look at it right here and the heater right now is drawing about 1,400 watts, which is actually really low for this inverter cuz this inverter is capable of putting out about 8,000 watts continuous. So, as I mentioned earlier, you can fill out the load panel to pull more power, but in our case, our uh use case wasn't exactly to power a bunch of circuits, but mainly even to charge an electric vehicle. That's the basics of this Quattro and we didn't get too heavily into any of the other advanced features, right?
Because it can do things like power assist, which means if you have AC connected and you're drawing more power from it, what it will do is if if you only have 10 amps of AC input capability and you're drawing 20, the other 10 will be supplemented from the battery sources to to supply that output, right? So, you're going to be thinking, oh, well, what situation would you need something like this? If you have an RV and you go to an RV park and they only give you 15 amp outlet, 20 amp outlet, 30 amp outlet, but you need 50 amps to run, I don't know, making up your stuff, ace your air conditioner unit and all your other microwaves and blenders and stuff, then this unit would be perfect for that because it can do power assist. Uh, you know, other uh devices can do that like the Multiplus twos and and stuff like that, but that's pretty much what power assist does.
It's also got the automatic switchover like I said earlier. So if AC1 goes down, you know, AC1 output here will just continuously be powering it. So it's got the relays or the transfer switch built in such that when the power goes out, it'll automatically switch over. So, if you have uh AC2 here, I'm not going to touch anything because it's, you know, still connected or on is that uh AC2, for instance, is a hot another port you could use in case you wanted to have things not be powered if you weren't plugged in to AC source or you can just configure it or program it all differently.
So, it's got a unlimited number of ways you can kind of do that. But the most typical way people would use AC2 is that if you have something, let's say your AC, your air conditioner unit. Um, and then you don't want that to be working if you're not plugged in the mains power, grid power, shore power. Then you would connect it to AC too so that you're not draining a ton of your energy from your batteries and you can use AC1 for lights or other stuff.
People will argue air conditioner is a necessity. So, you know, that situation, for example, may not be perfect, but that's really how that would work. Also, as you can tell right now, only thing you're really getting is a low frequency hum. So, if you want to install this in an indoor more, you know, inside an RV type situation where you can hear stuff, that could be annoying.
Maybe a uh something to consider in case, you know, that's something that you're doing. But if you're installing it in a remote place, that's not going to be a problem whatsoever. So, uh we actually purchased this unit from Signature Solar. We actually did purchase two of them.
and all the other stuff that you see here. I mean, obviously besides the load center. Uh, and if you want to pick up something like this, I would highly recommend you go check that out. Especially when they do like free shipping promotions and stuff like that, you can get a lot of the freight shipping for free.
And this unit is really heavy. So, it's going to be shipped freight. All right. So, the only reason I'm telling you that right now is because we've already purchased the uh two units that do that.
And we're just going to go this about this in a uh series of getting it there. Mainly because there's so much these inverters can do. it would, you know, just not do it justice, right? So, uh, this is here.
My ideal situation is have another one of these, uh, indoor wall mount batteries right next to here and have them two side by side. I just don't know if I can make that happen. Uh, but the idea is that eventually you want to get a second one of these, configure it in split phase, and then power the load center. That way, you get 240 in load center, and then you could do pretty much almost anything.
mainly because this one here only does a single phase out. So, it's going to give you about 10,000 uh VA at singlephase 120. So, if you think about that, that's a lot of amps. All right?
So, make sure when you're dealing with any of this, be careful. Uh don't, you know, shock yourself or do any of that stuff. But hopefully this video helped you guys out. So, if you have any questions, let us know.
Have a great day. Get back to work and we'll see you guys next time. Heat. Hey, heat.
Hey, heat.